Dual Booting Linux on a Machine That Barely Runs Windows — Part 2: BIOS, Boot Failures and the Troubleshooting
Dual Booting Linux on a Machine That Barely Runs Windows
Part 2 — BIOS, Boot Failures and the Troubleshooting
By the time I got here, I had already done what felt like the hard part.
The Windows partition had been shrunk. The Linux Mint ISO had been downloaded. Ventoy was ready, and the ISO had been copied onto the SD card through my Tecno T455.
On paper, I was ready to boot into Linux.
I thought this would be the easy part. Facts straight, tools ready, everything in place.
I had no idea I was about to walk into a technical minefield.
First Contact with the BIOS Boot Menu
I restarted the laptop and entered the boot menu to select the device I wanted to boot from.
This was my first time inside a BIOS. No confidence. No prior experience. Just guesswork guided by research. Up until this point, operating systems had always felt like something that simply came with the machine. Now I was trying to intervene at the level where the machine decides what it should even boot in the first place.
The laptop detected the Tecno T455 connection as a bootable device.
That alone felt like progress.
So I selected it.
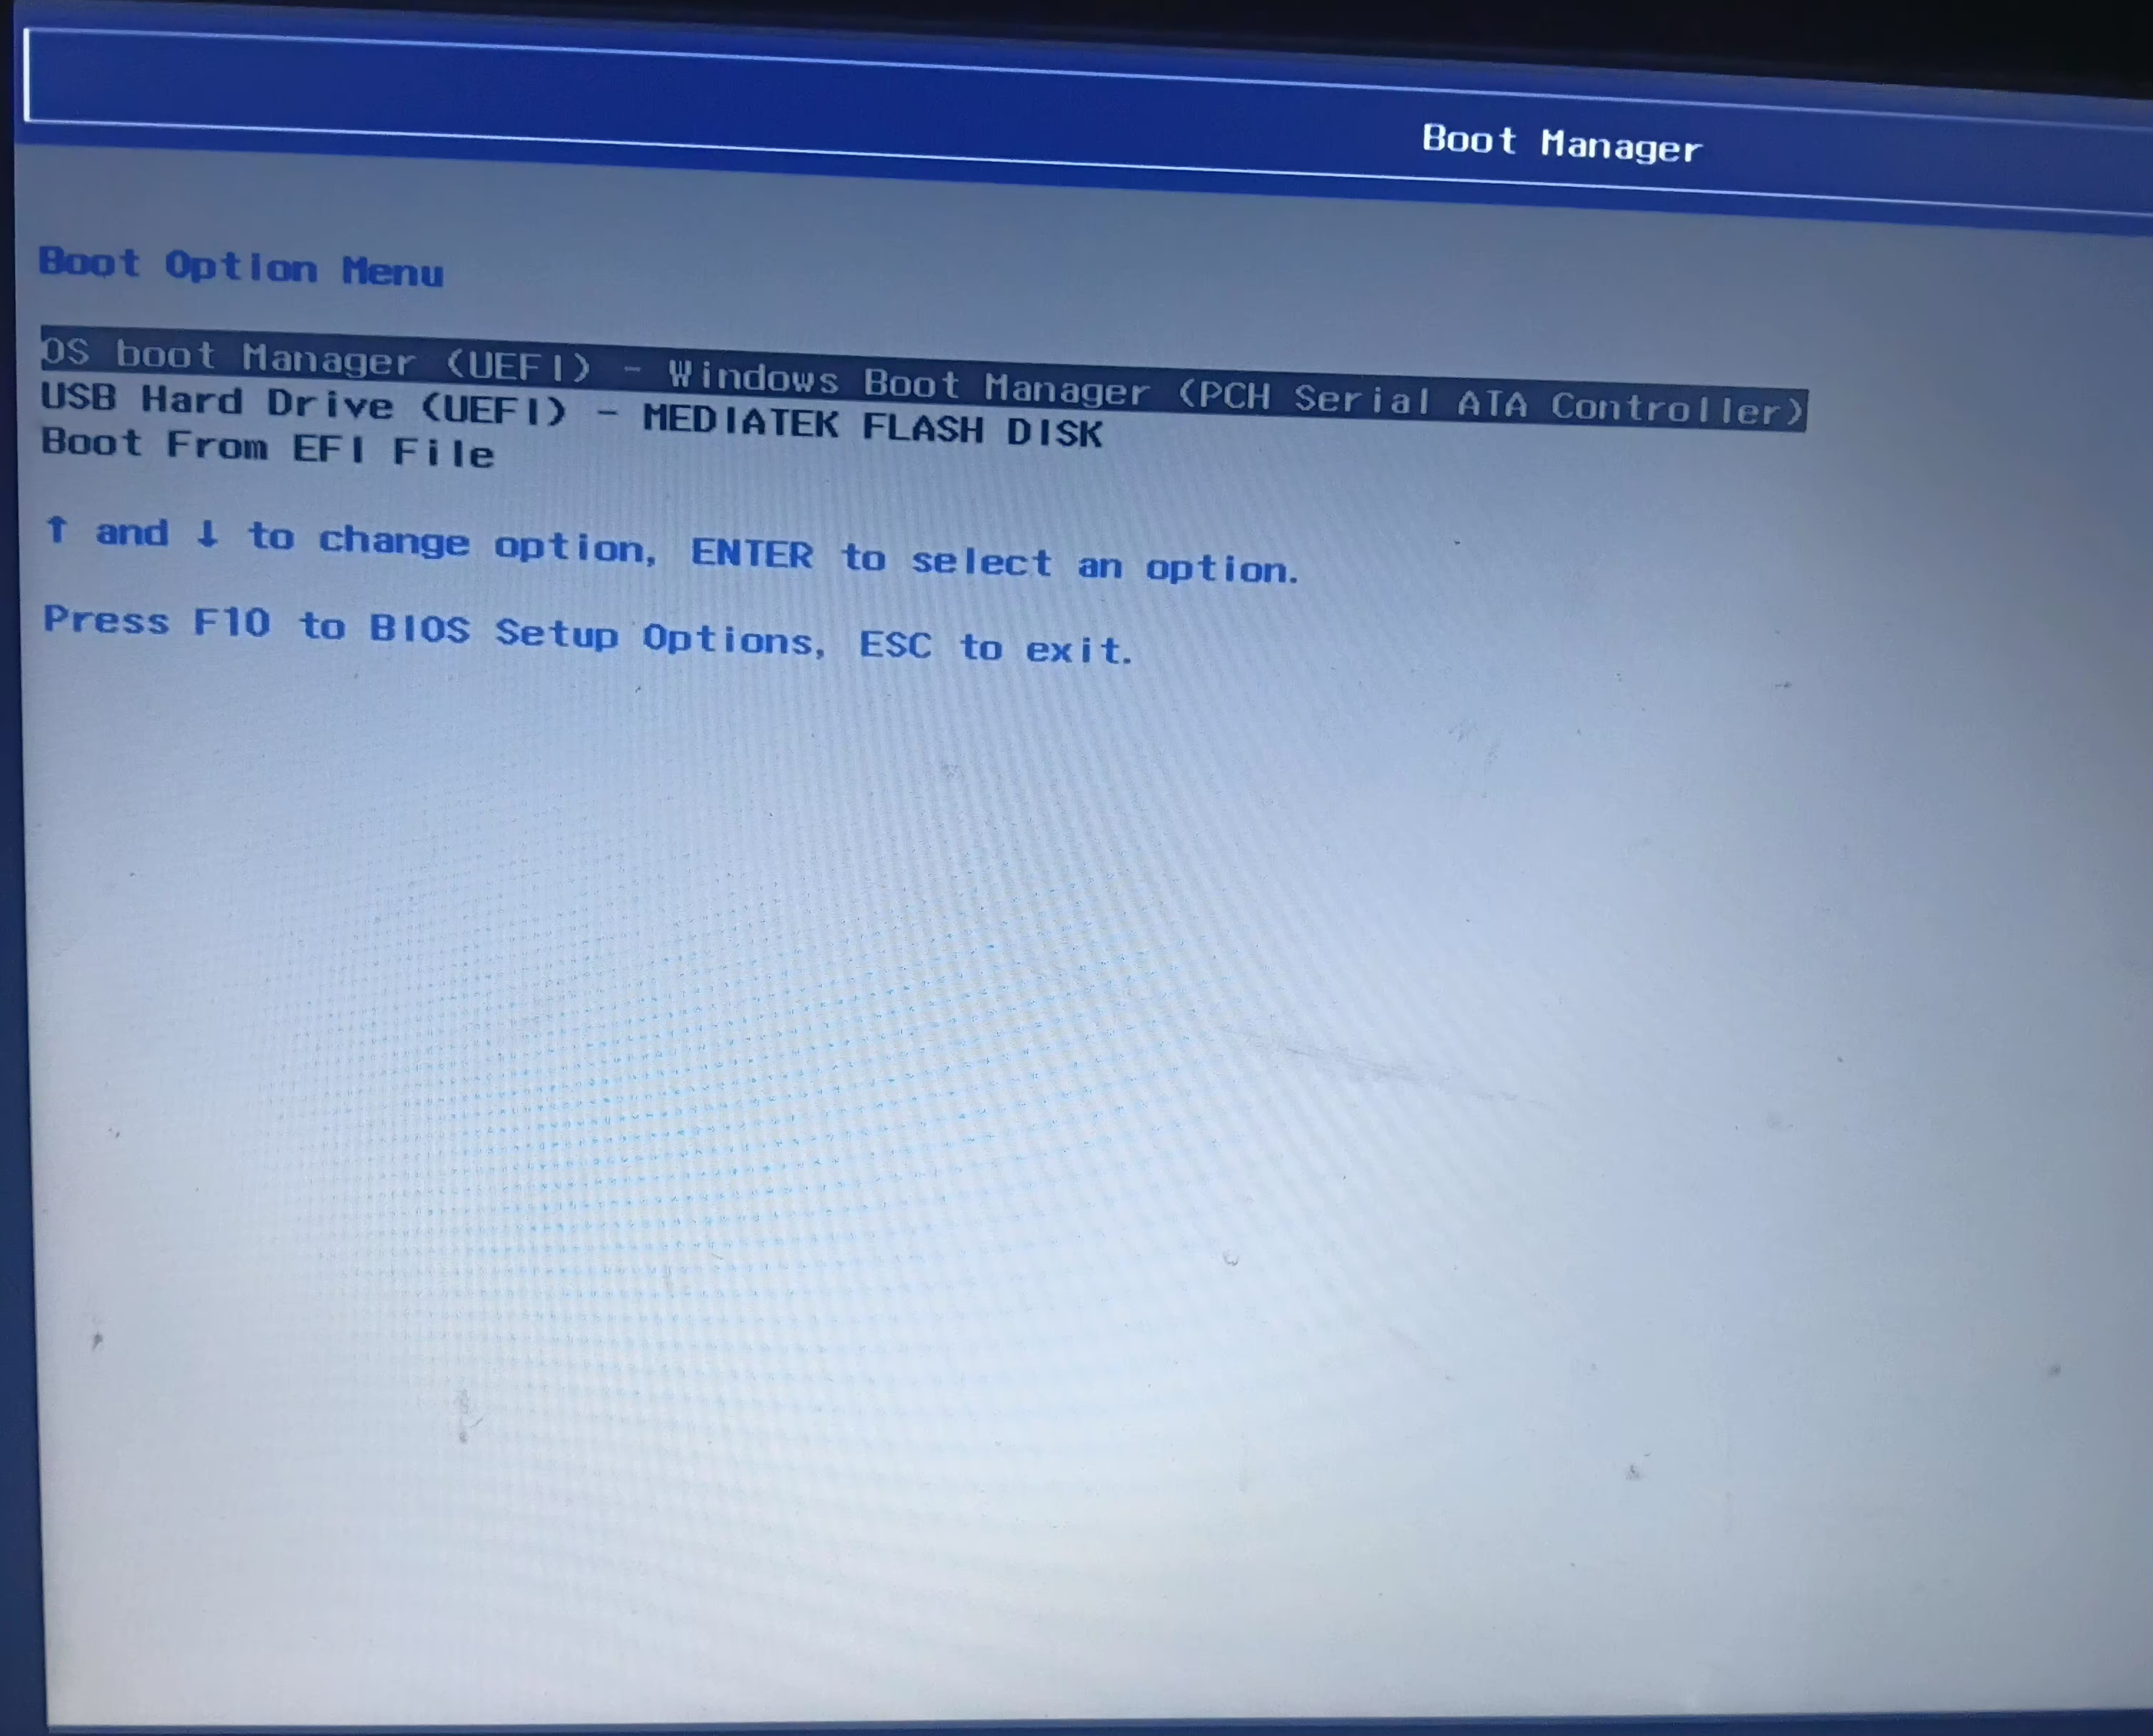
Then it failed immediately.
There was no Linux boot screen. No Ventoy menu. No GRUB. Nothing meaningful to work with. The attempt stopped almost as soon as it began.
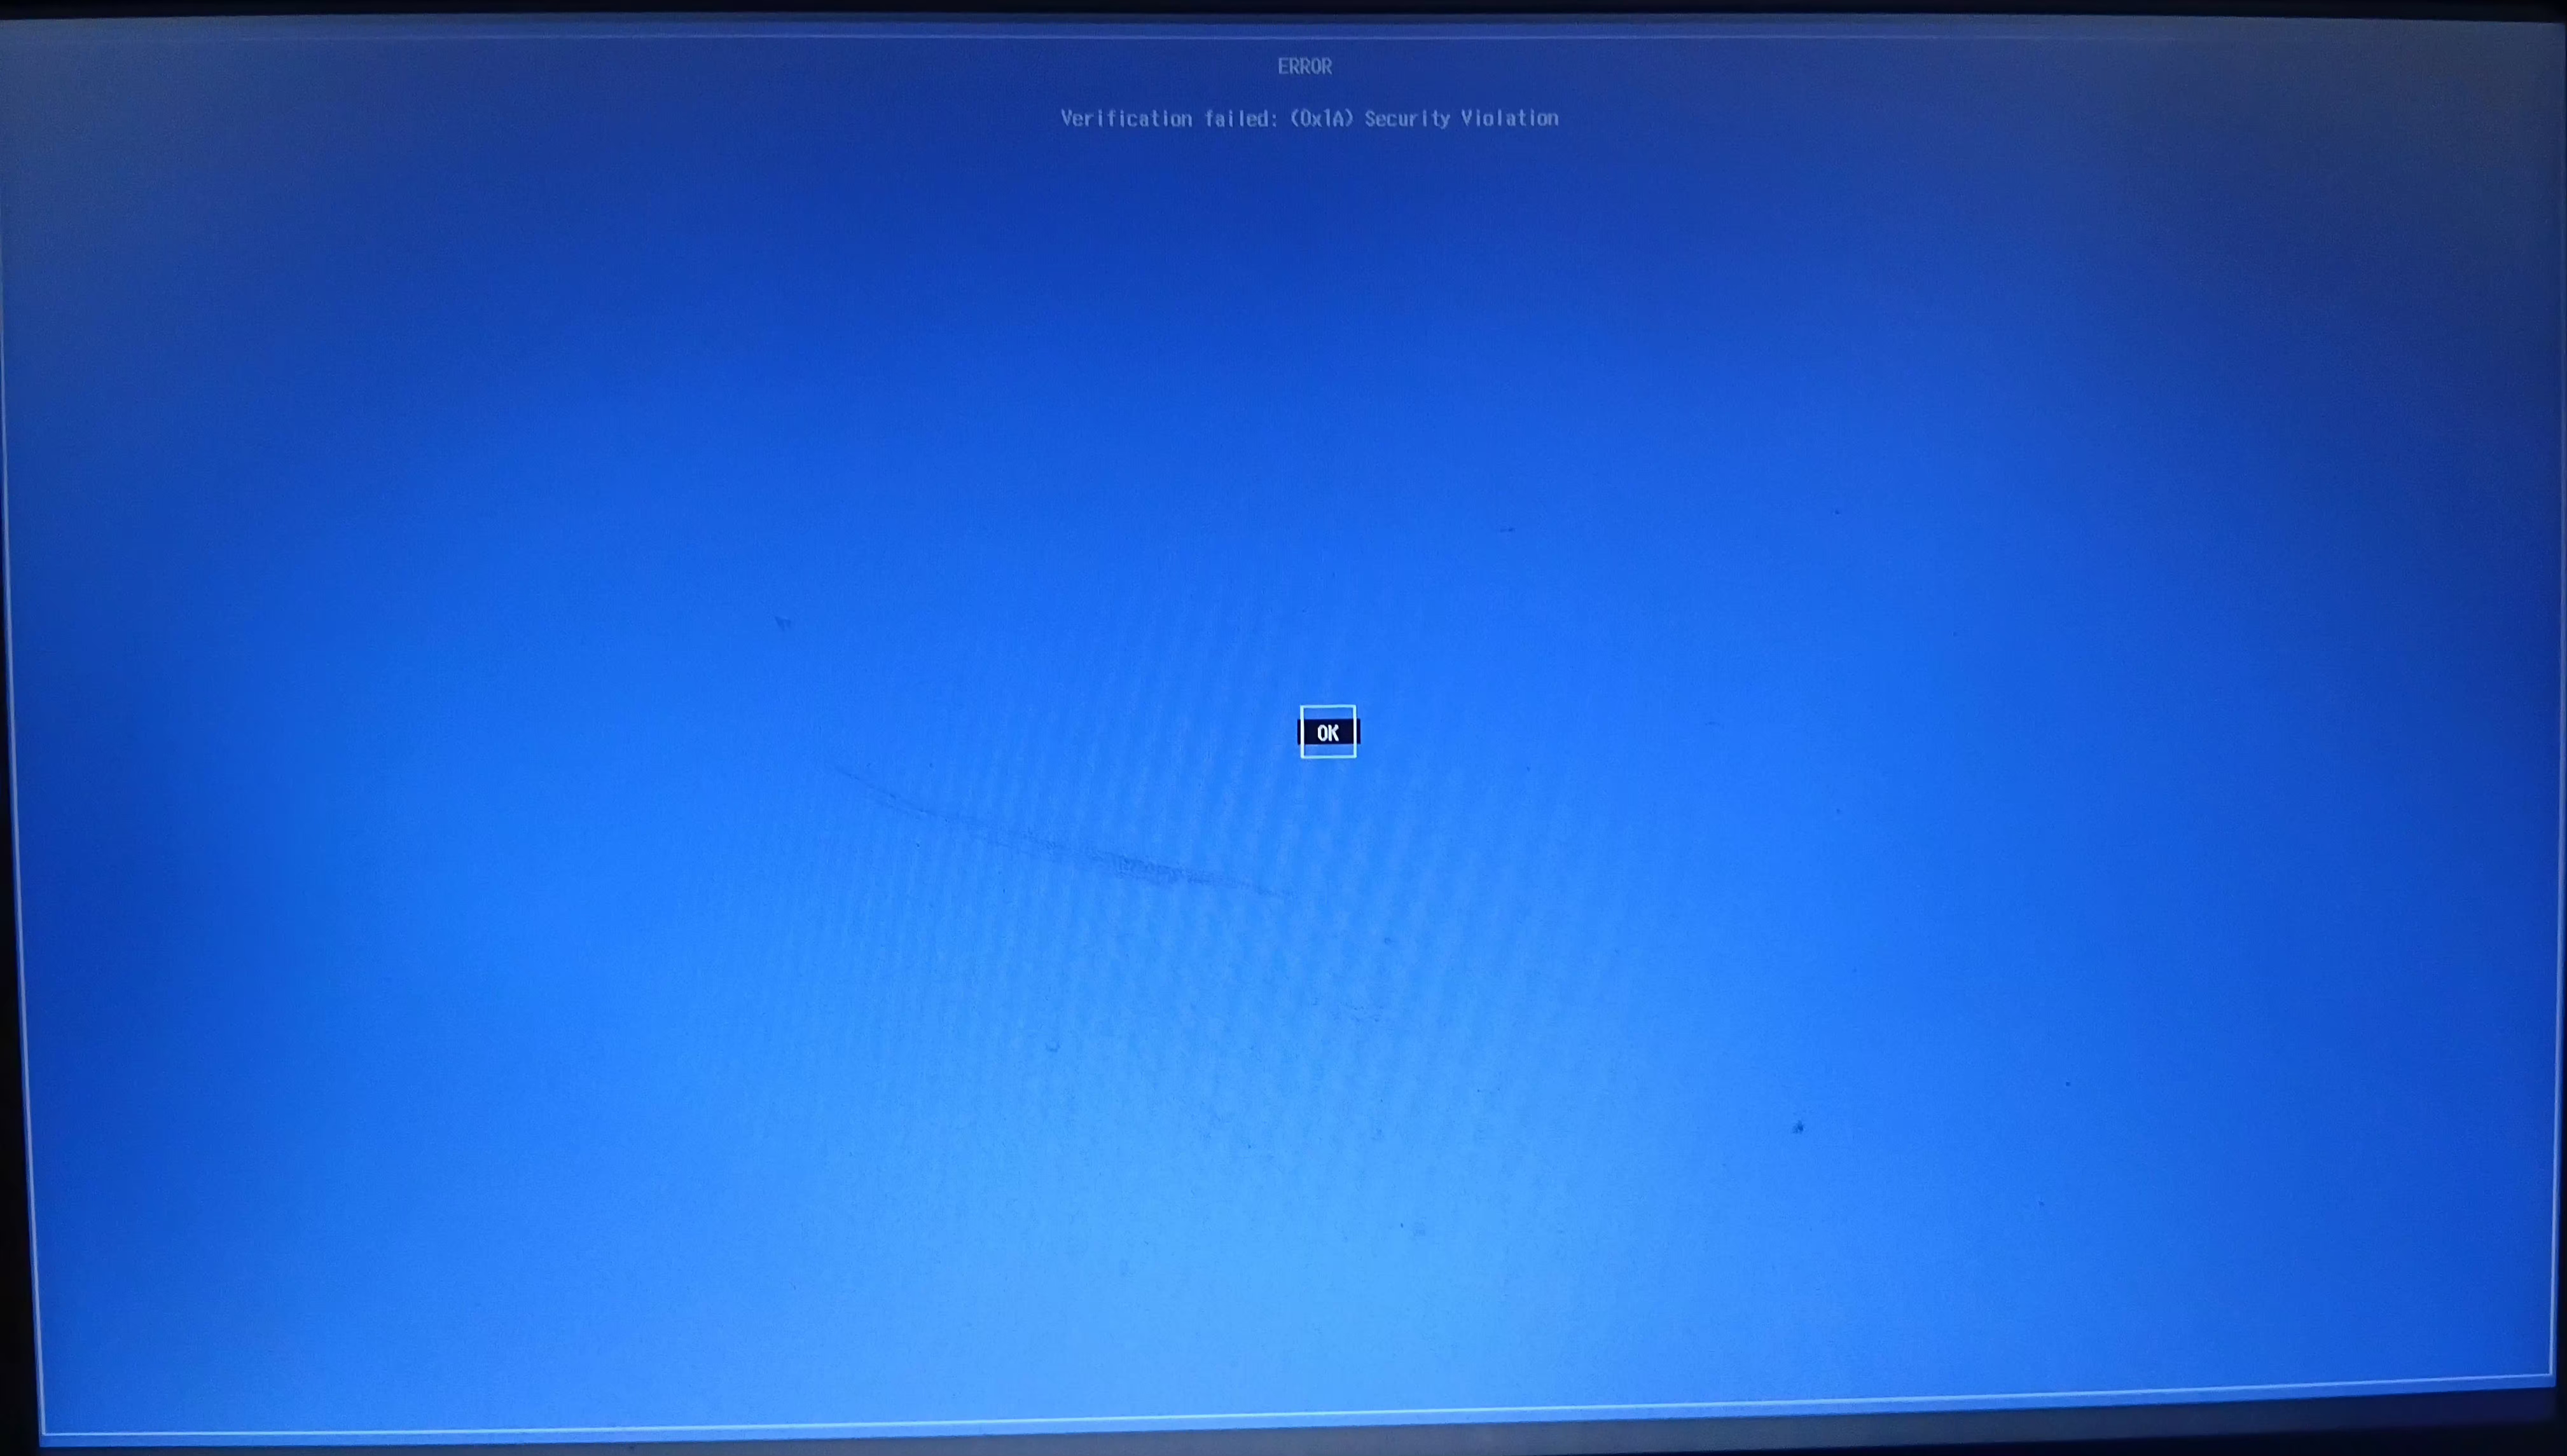
That was the first real shock of the project. It made me wonder if I actually had all the facts right like I had confidently assumed.
The First Failure: Recognized, but Not Booting
This was a confusing kind of failure because the device was clearly visible in the boot menu. The BIOS had recognized it. So at first glance, everything looked correct.
But device recognition is not the same thing as successful boot compatibility.
A BIOS can see a connected storage device and still refuse to boot from it if the boot mode, security settings, or device presentation do not line up properly.
At that point, I did not yet understand that distinction clearly. The device was in the menu. I selected it. It still failed.
That was the moment I realized I was no longer in ordinary Windows troubleshooting territory.
Entering BIOS Settings to Troubleshoot
Since the device was being detected but still not booting, I went into the BIOS settings to see what could be blocking it.
The setting I actually intended to change was Secure Boot.
Secure Boot is a UEFI security feature that allows the system to boot only software signed by trusted authorities. That is useful for security, but it can also interfere with some Linux boot setups depending on how the boot media is prepared and how the firmware behaves.
Specifically, Secure Boot was not rejecting Linux Mint itself — Mint’s bootloader is signed by Microsoft’s UEFI Certificate Authority. Secure Boot was rejecting Ventoy’s unsigned bootloader. With Secure Boot enabled, my HP firmware refused to hand control to Ventoy before it could even display the menu. That is why the device was visible in BIOS but failed to boot — the firmware saw an unsigned bootloader and blocked it at the gate.
So the plan was simple: disable Secure Boot and try again.
What happened was less simple.
The Settings Mistake
While navigating the BIOS settings, I accidentally toggled Legacy Support when I meant to toggle Secure Boot.
I made that mistake because I was still unfamiliar with the BIOS layout, moving carefully but without fully understanding what each setting actually did.
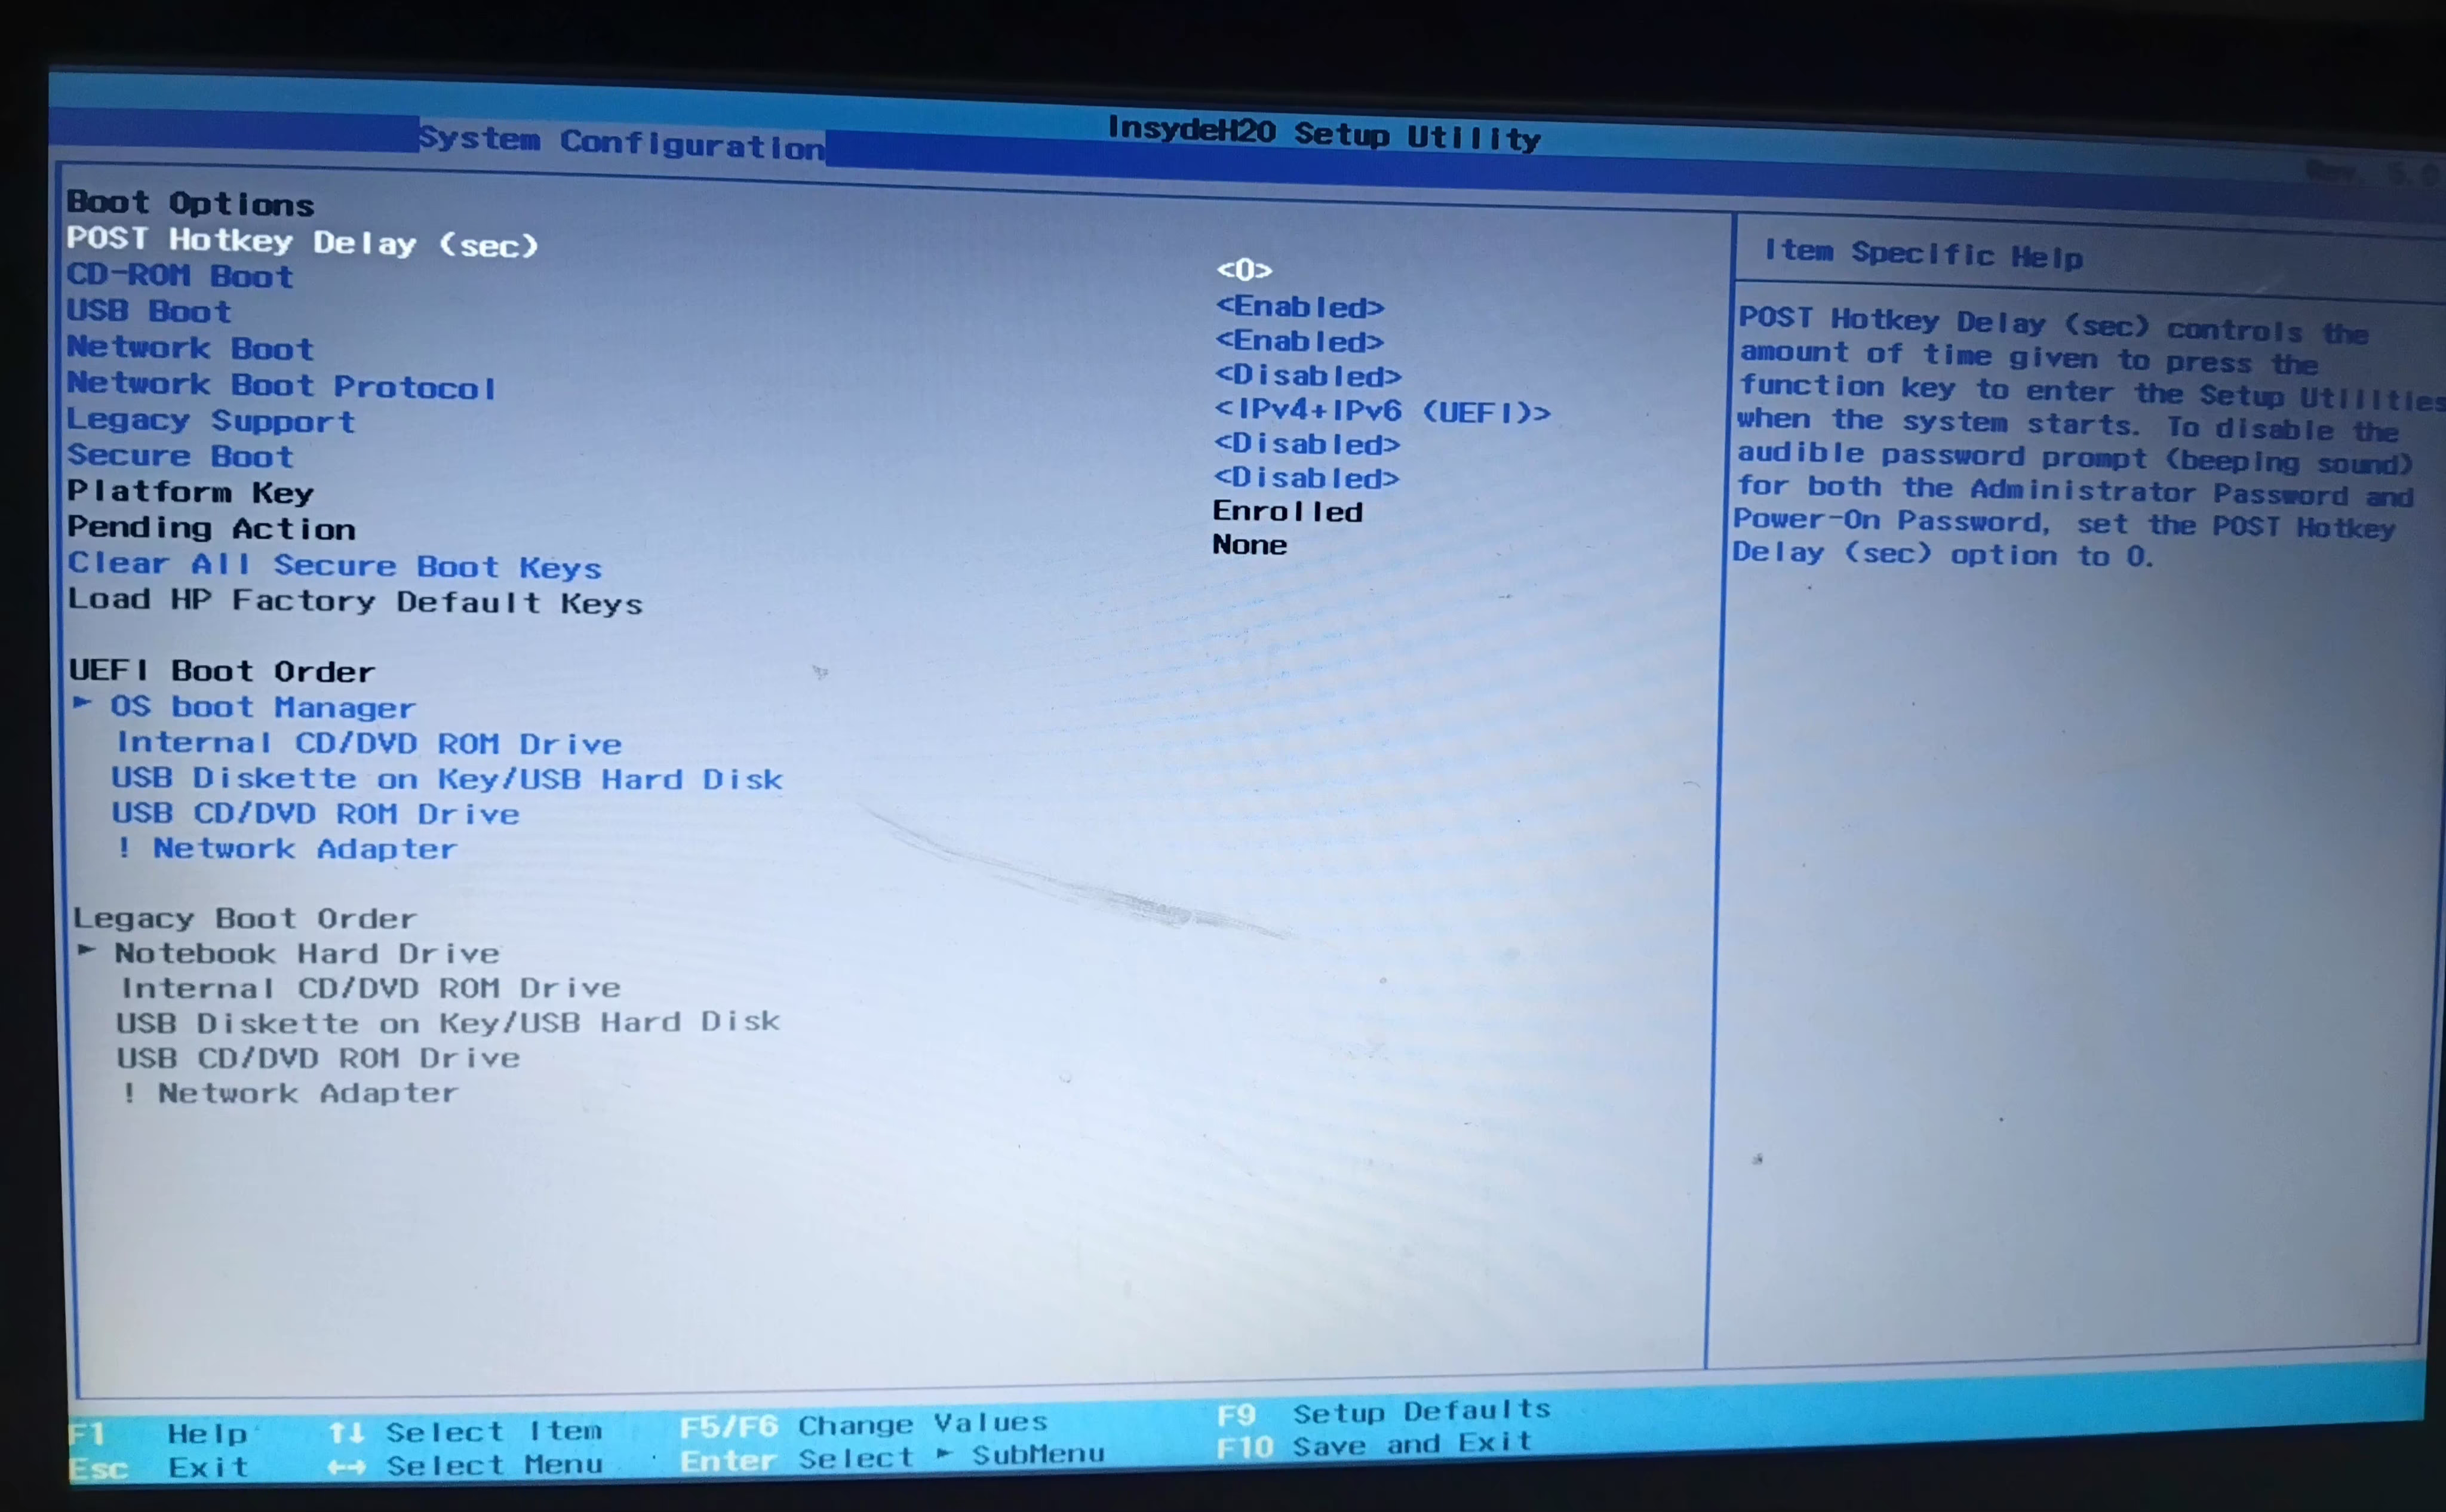
I only discovered the mistake later when I checked the settings again.
At the time, I had not intended to touch Legacy Support at all.
Legacy Support, also called CSM (Compatibility Support Module) on some systems, is a compatibility mode that allows the firmware to boot older, non-UEFI boot methods alongside the modern UEFI standard. My Windows 11 installation was already using UEFI boot, so Legacy Support was not the setting I needed for this situation.
Thankfully, toggling it did not break anything on its own. Enabling Legacy Support alongside UEFI simply adds an extra compatibility layer. It does not replace or disable UEFI boot. The system can still boot using the modern standard, which is exactly what it continued to do.
The real danger would have been setting the boot mode to Legacy only, which would have disabled UEFI entirely and prevented Windows 11 from booting at all.
That did not happen.
Disabling Secure Boot
After noticing the mistake, I made sure Secure Boot was actually turned off.
That was the intended change from the start.
On HP systems, changing a security-sensitive BIOS setting often triggers a confirmation screen where you have to type a numeric code shown on the display and press Enter to confirm that the action is deliberate.
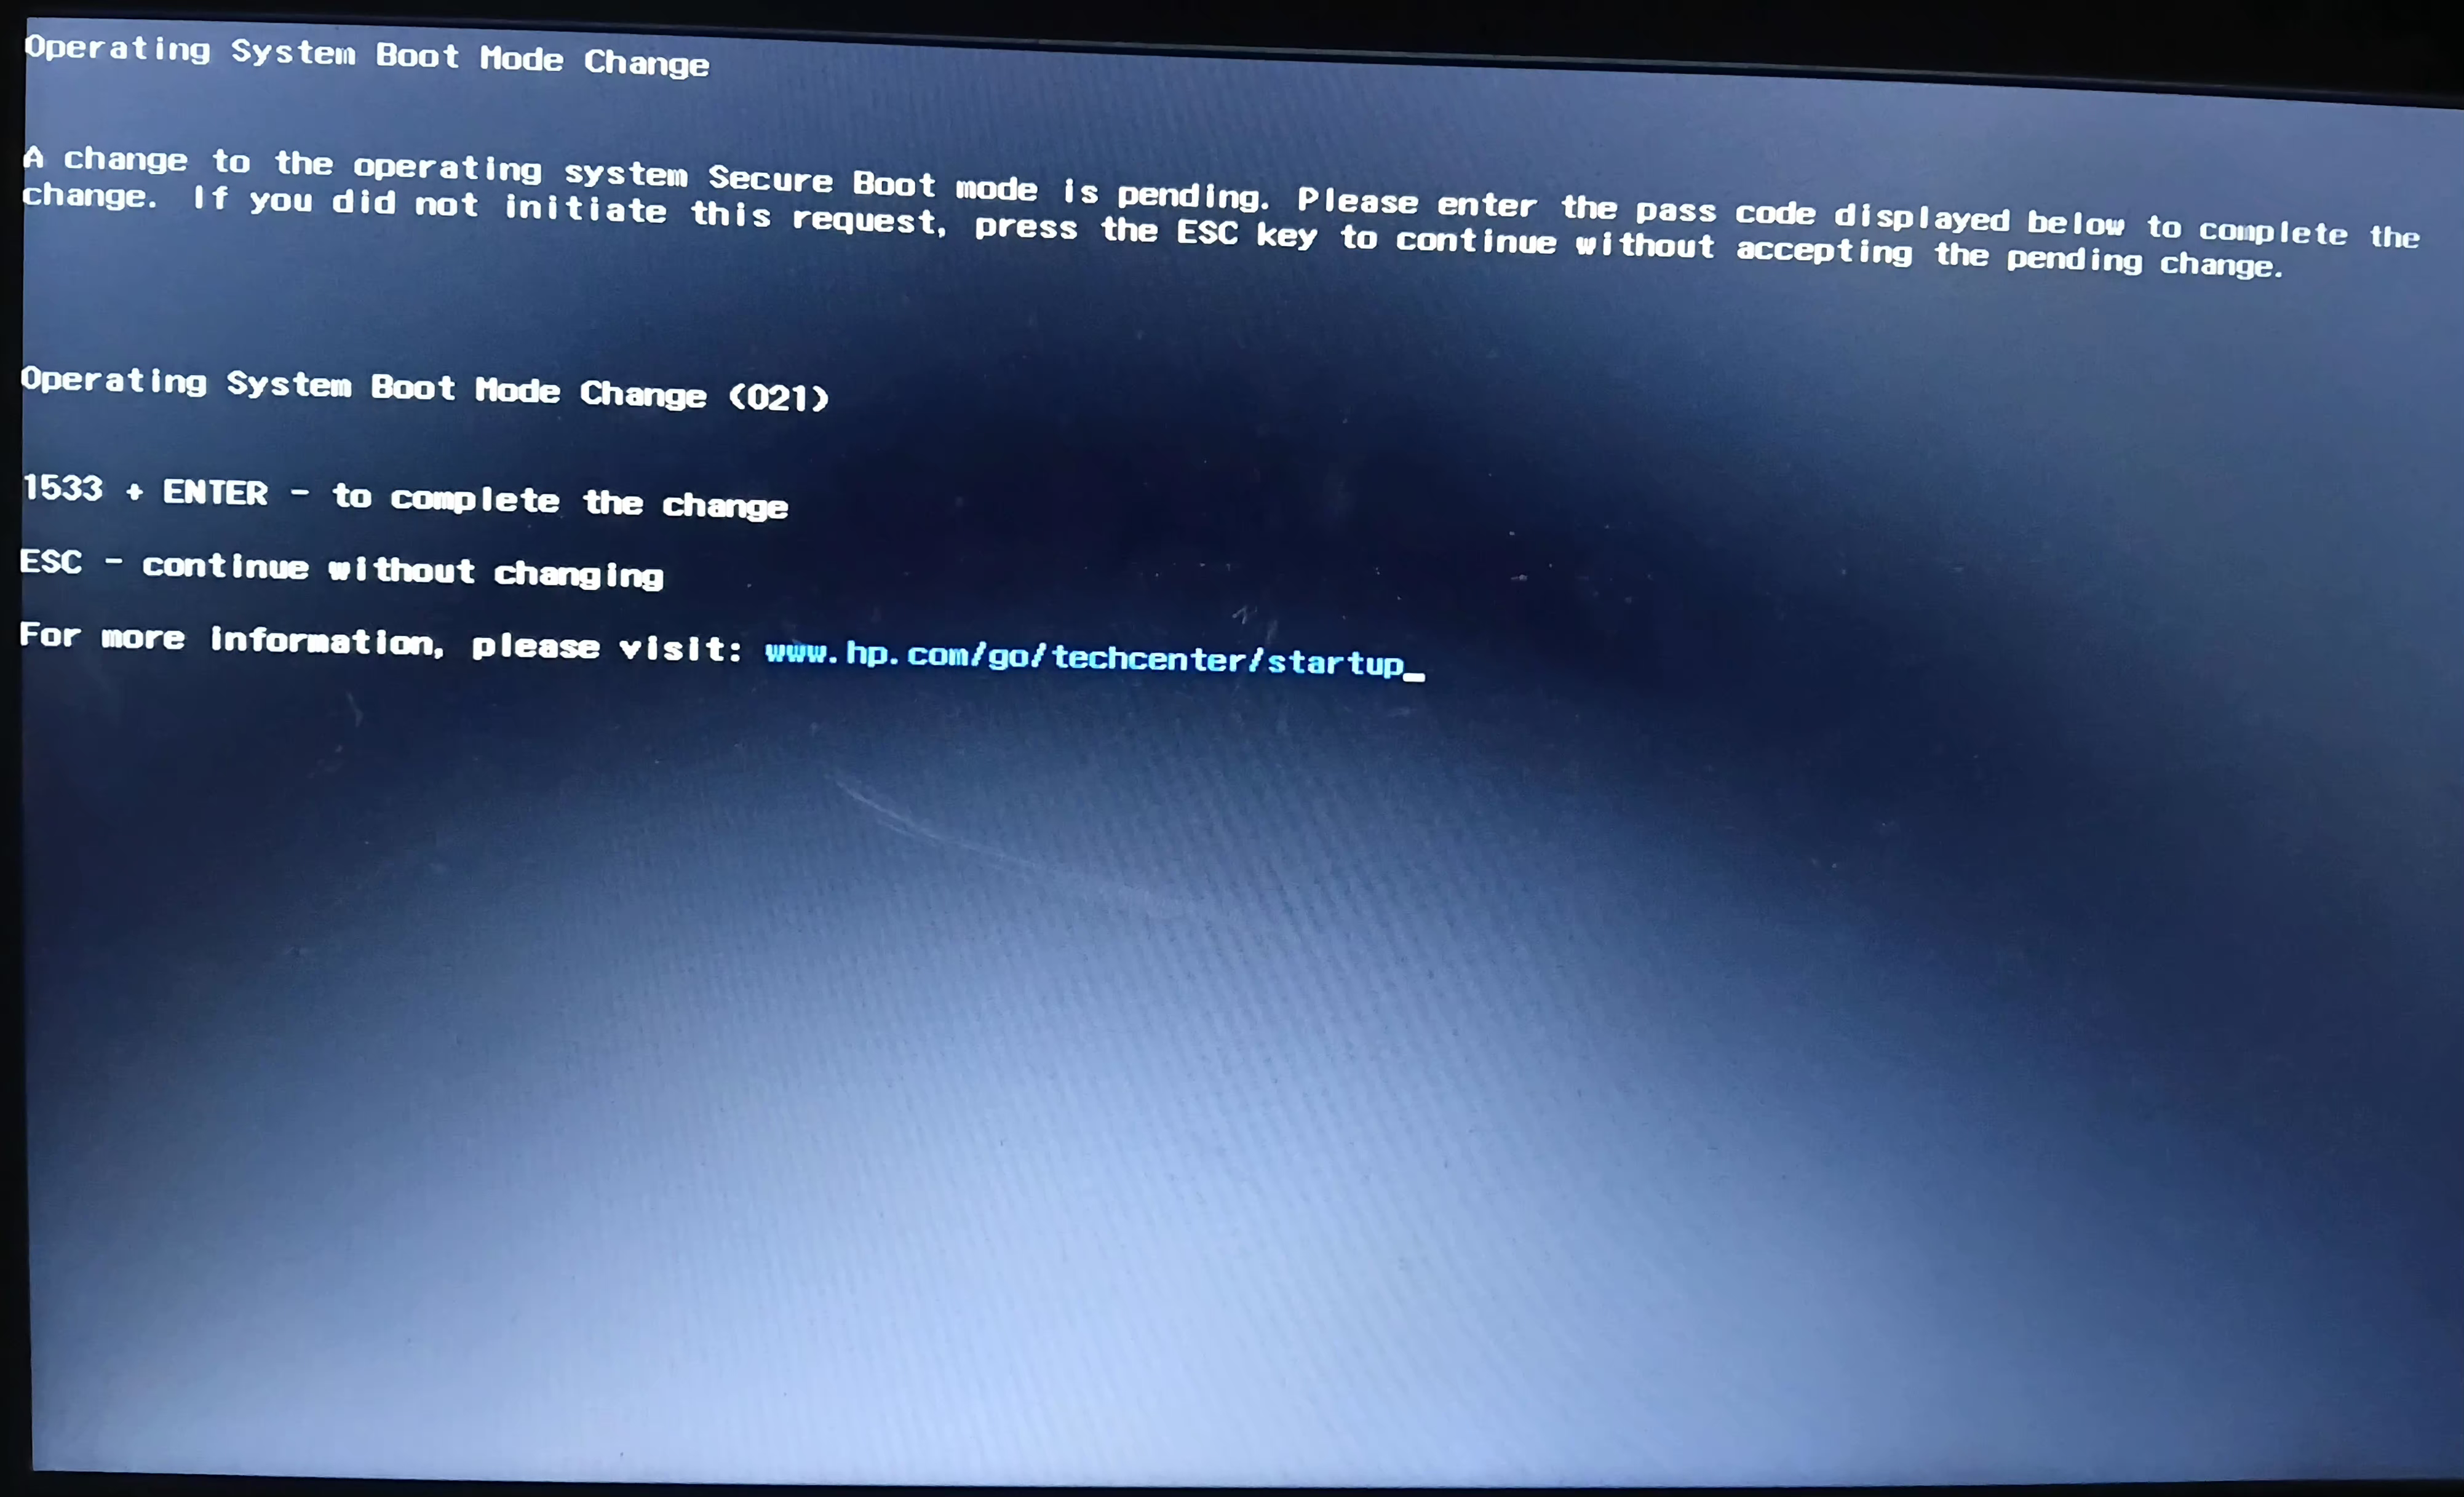
I entered the code, confirmed the change, and saved the BIOS settings.
At that point, I tried booting again.
This time, I got further.
The Tecno T455 device still appeared in the boot menu. I selected it again, and now the system finally moved past the immediate failure point.
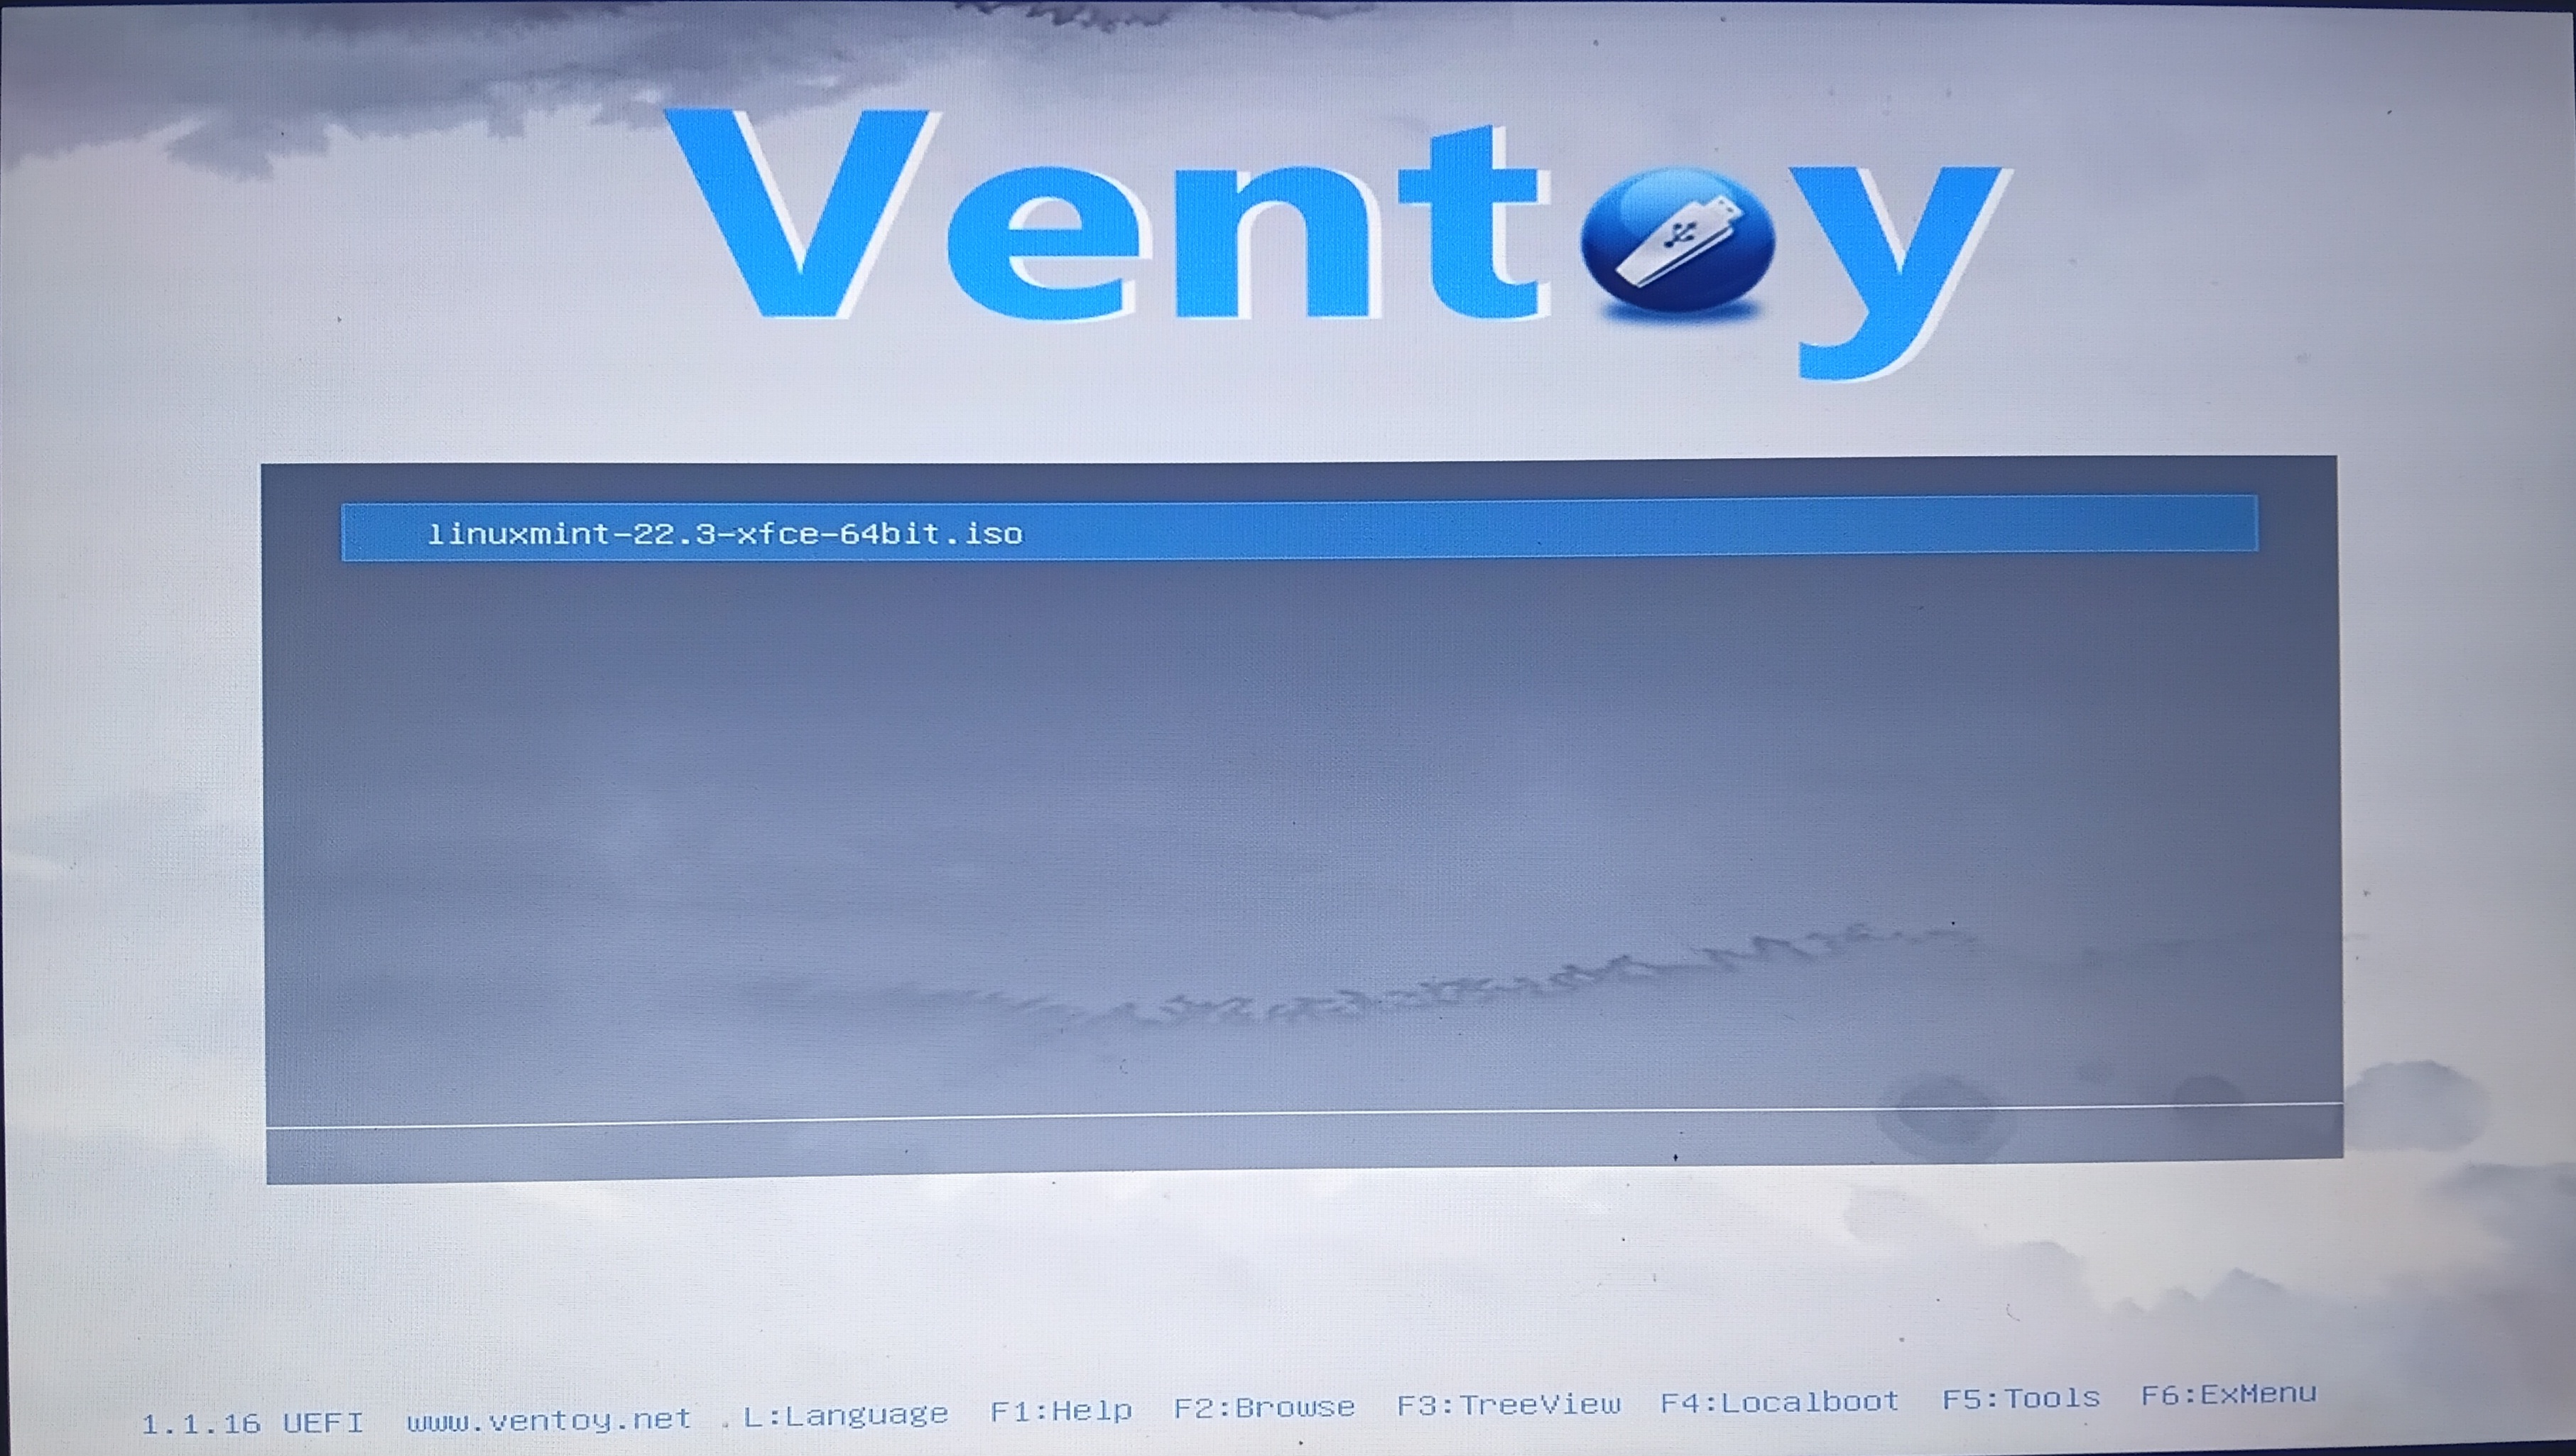
Ventoy loaded.
That felt like a breakthrough.
But the real trouble had only just begun.
The Ventoy Boot Menu
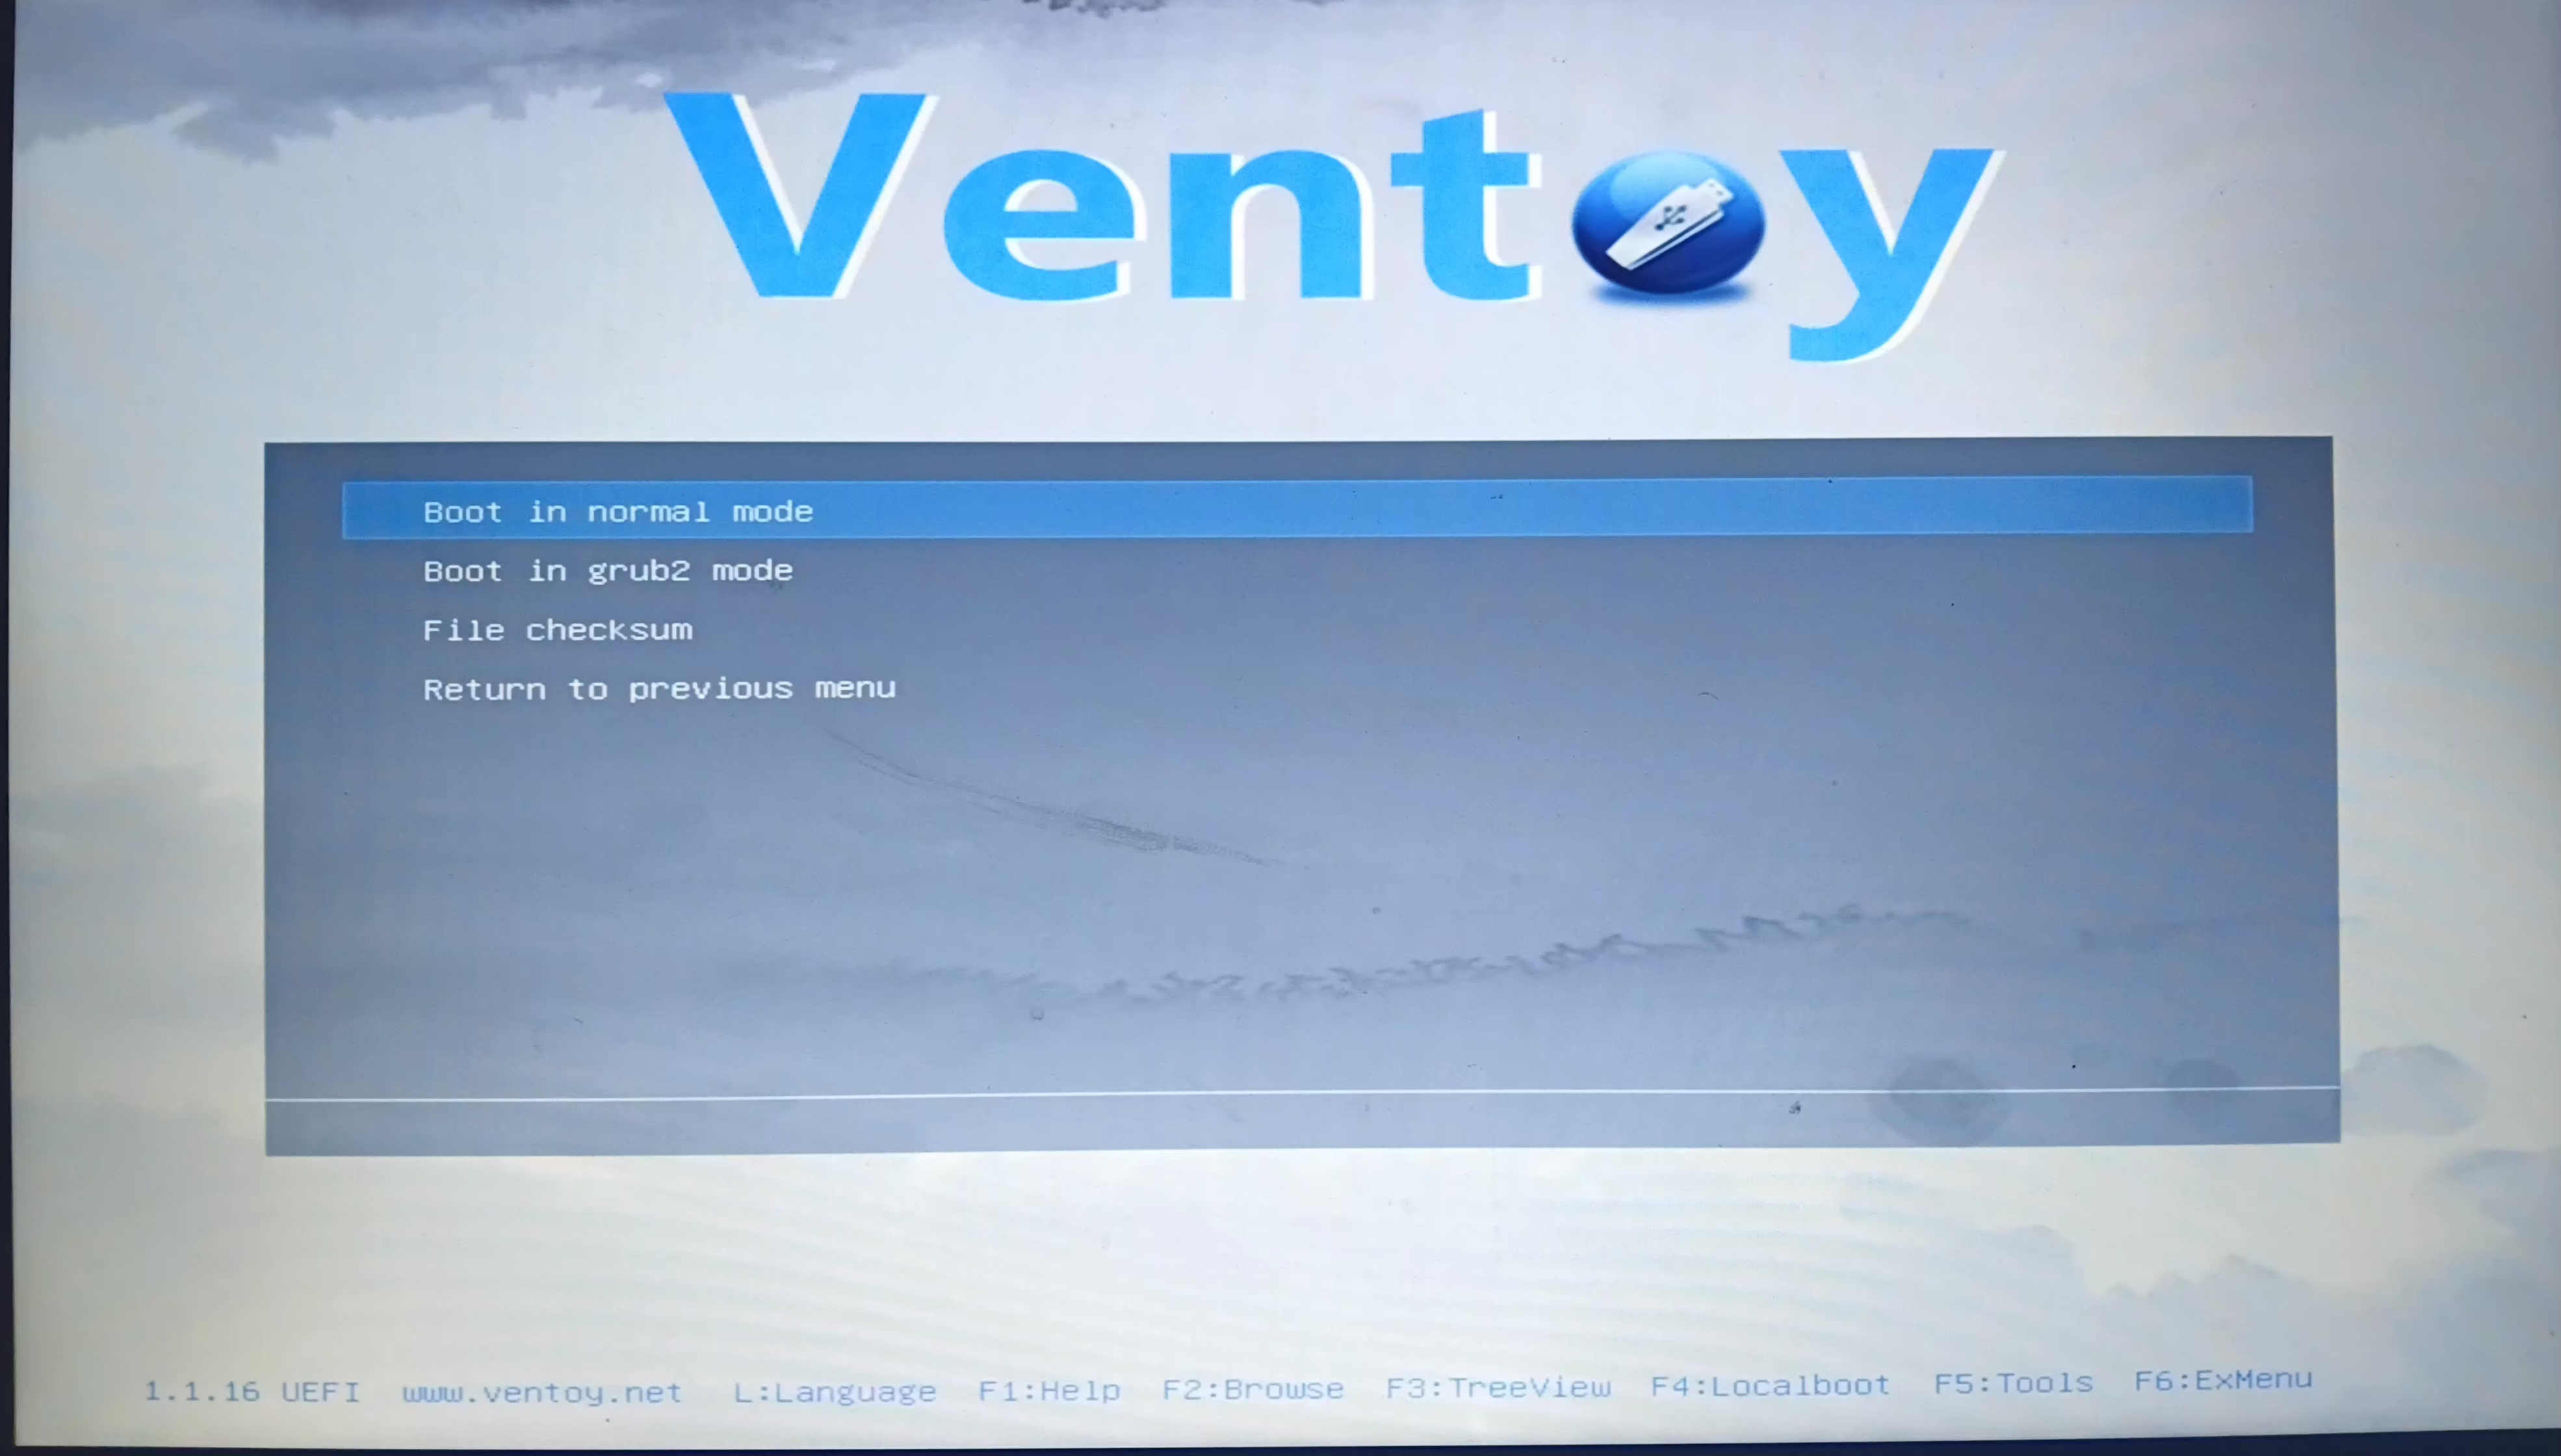
Ventoy loaded and presented me with a boot menu. The Linux Mint XFCE 22.3 ISO file was already highlighted as the only available option. I selected it, chose “Boot in normal mode” from the next menu, and landed at the GRUB bootloader.
The GRUB Menu
GRUB is the bootloader that handles the transition between selecting a boot device and actually starting the operating system.
The GRUB menu showed several options. The two that mattered were:
- Start Linux Mint XFCE 22.3 64-bit
- Start Linux Mint XFCE 22.3 64-bit (compatibility mode)
The first option was highlighted by default.
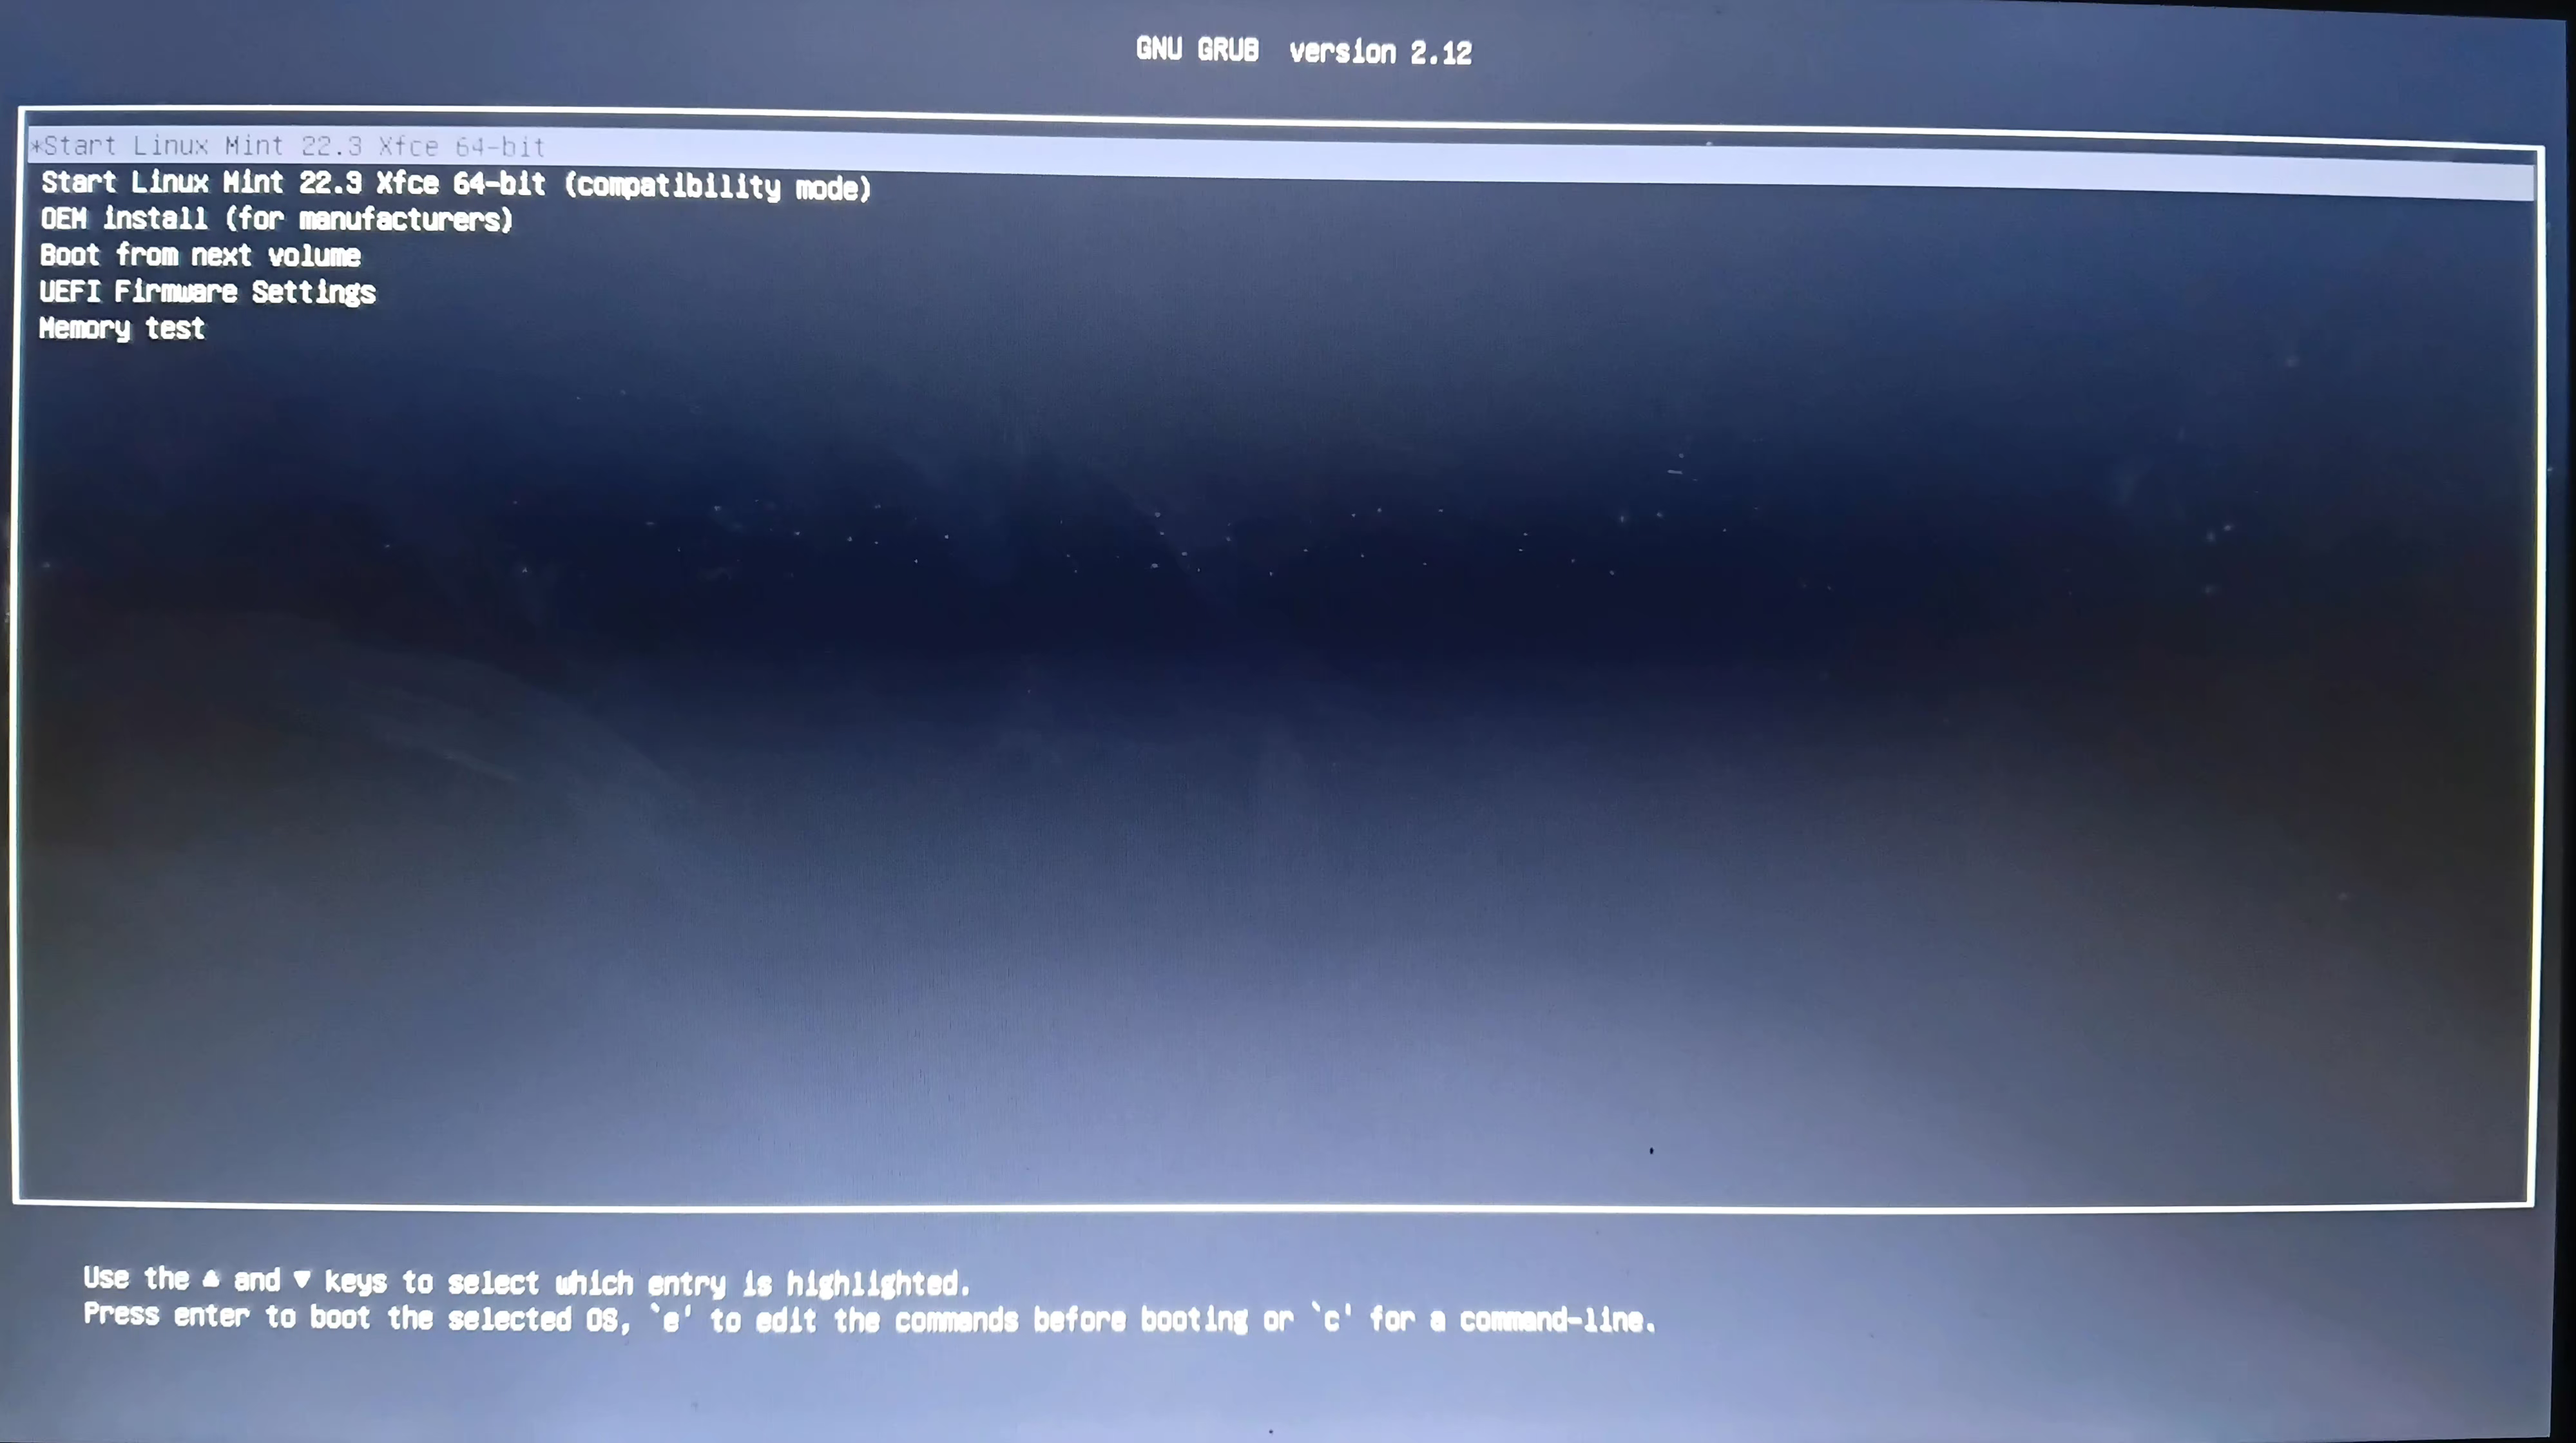
I selected it.
Getting Stuck at a Frozen Logo
The Linux Mint logo appeared on screen.
And then nothing happened.
The logo stayed static. The screen blinked once. Then the logo just sat there. No loading bar. No visible progress. No desktop appearing behind it. Just a frozen logo on a black screen.
At first, I waited.
And kept waiting.
I waited over 30 minutes. There was no way to tell if the system was slowly loading in the background or had completely stalled. Eventually, I couldn’t tell the difference between patience and wasted time. I forced a reboot.
Attempting Compatibility Mode
I restarted and cycled through the same sequence back to the GRUB menu. This time I selected Start Linux Mint XFCE 22.3 64-bit (compatibility mode) instead.
Compatibility mode uses different graphics settings and fallback kernel parameters designed to work around hardware issues that might prevent a standard boot from completing.
I was hoping this would bypass whatever had caused the freeze.
It did not.
The Text Flood
Instead of a frozen logo, I got something entirely different.
Lines of text began flooding the screen. Fast. Dense. Technical. It looked like the system was dumping every internal process message directly onto the display.
I couldn’t tell if the system was still trying or had already finished failing.
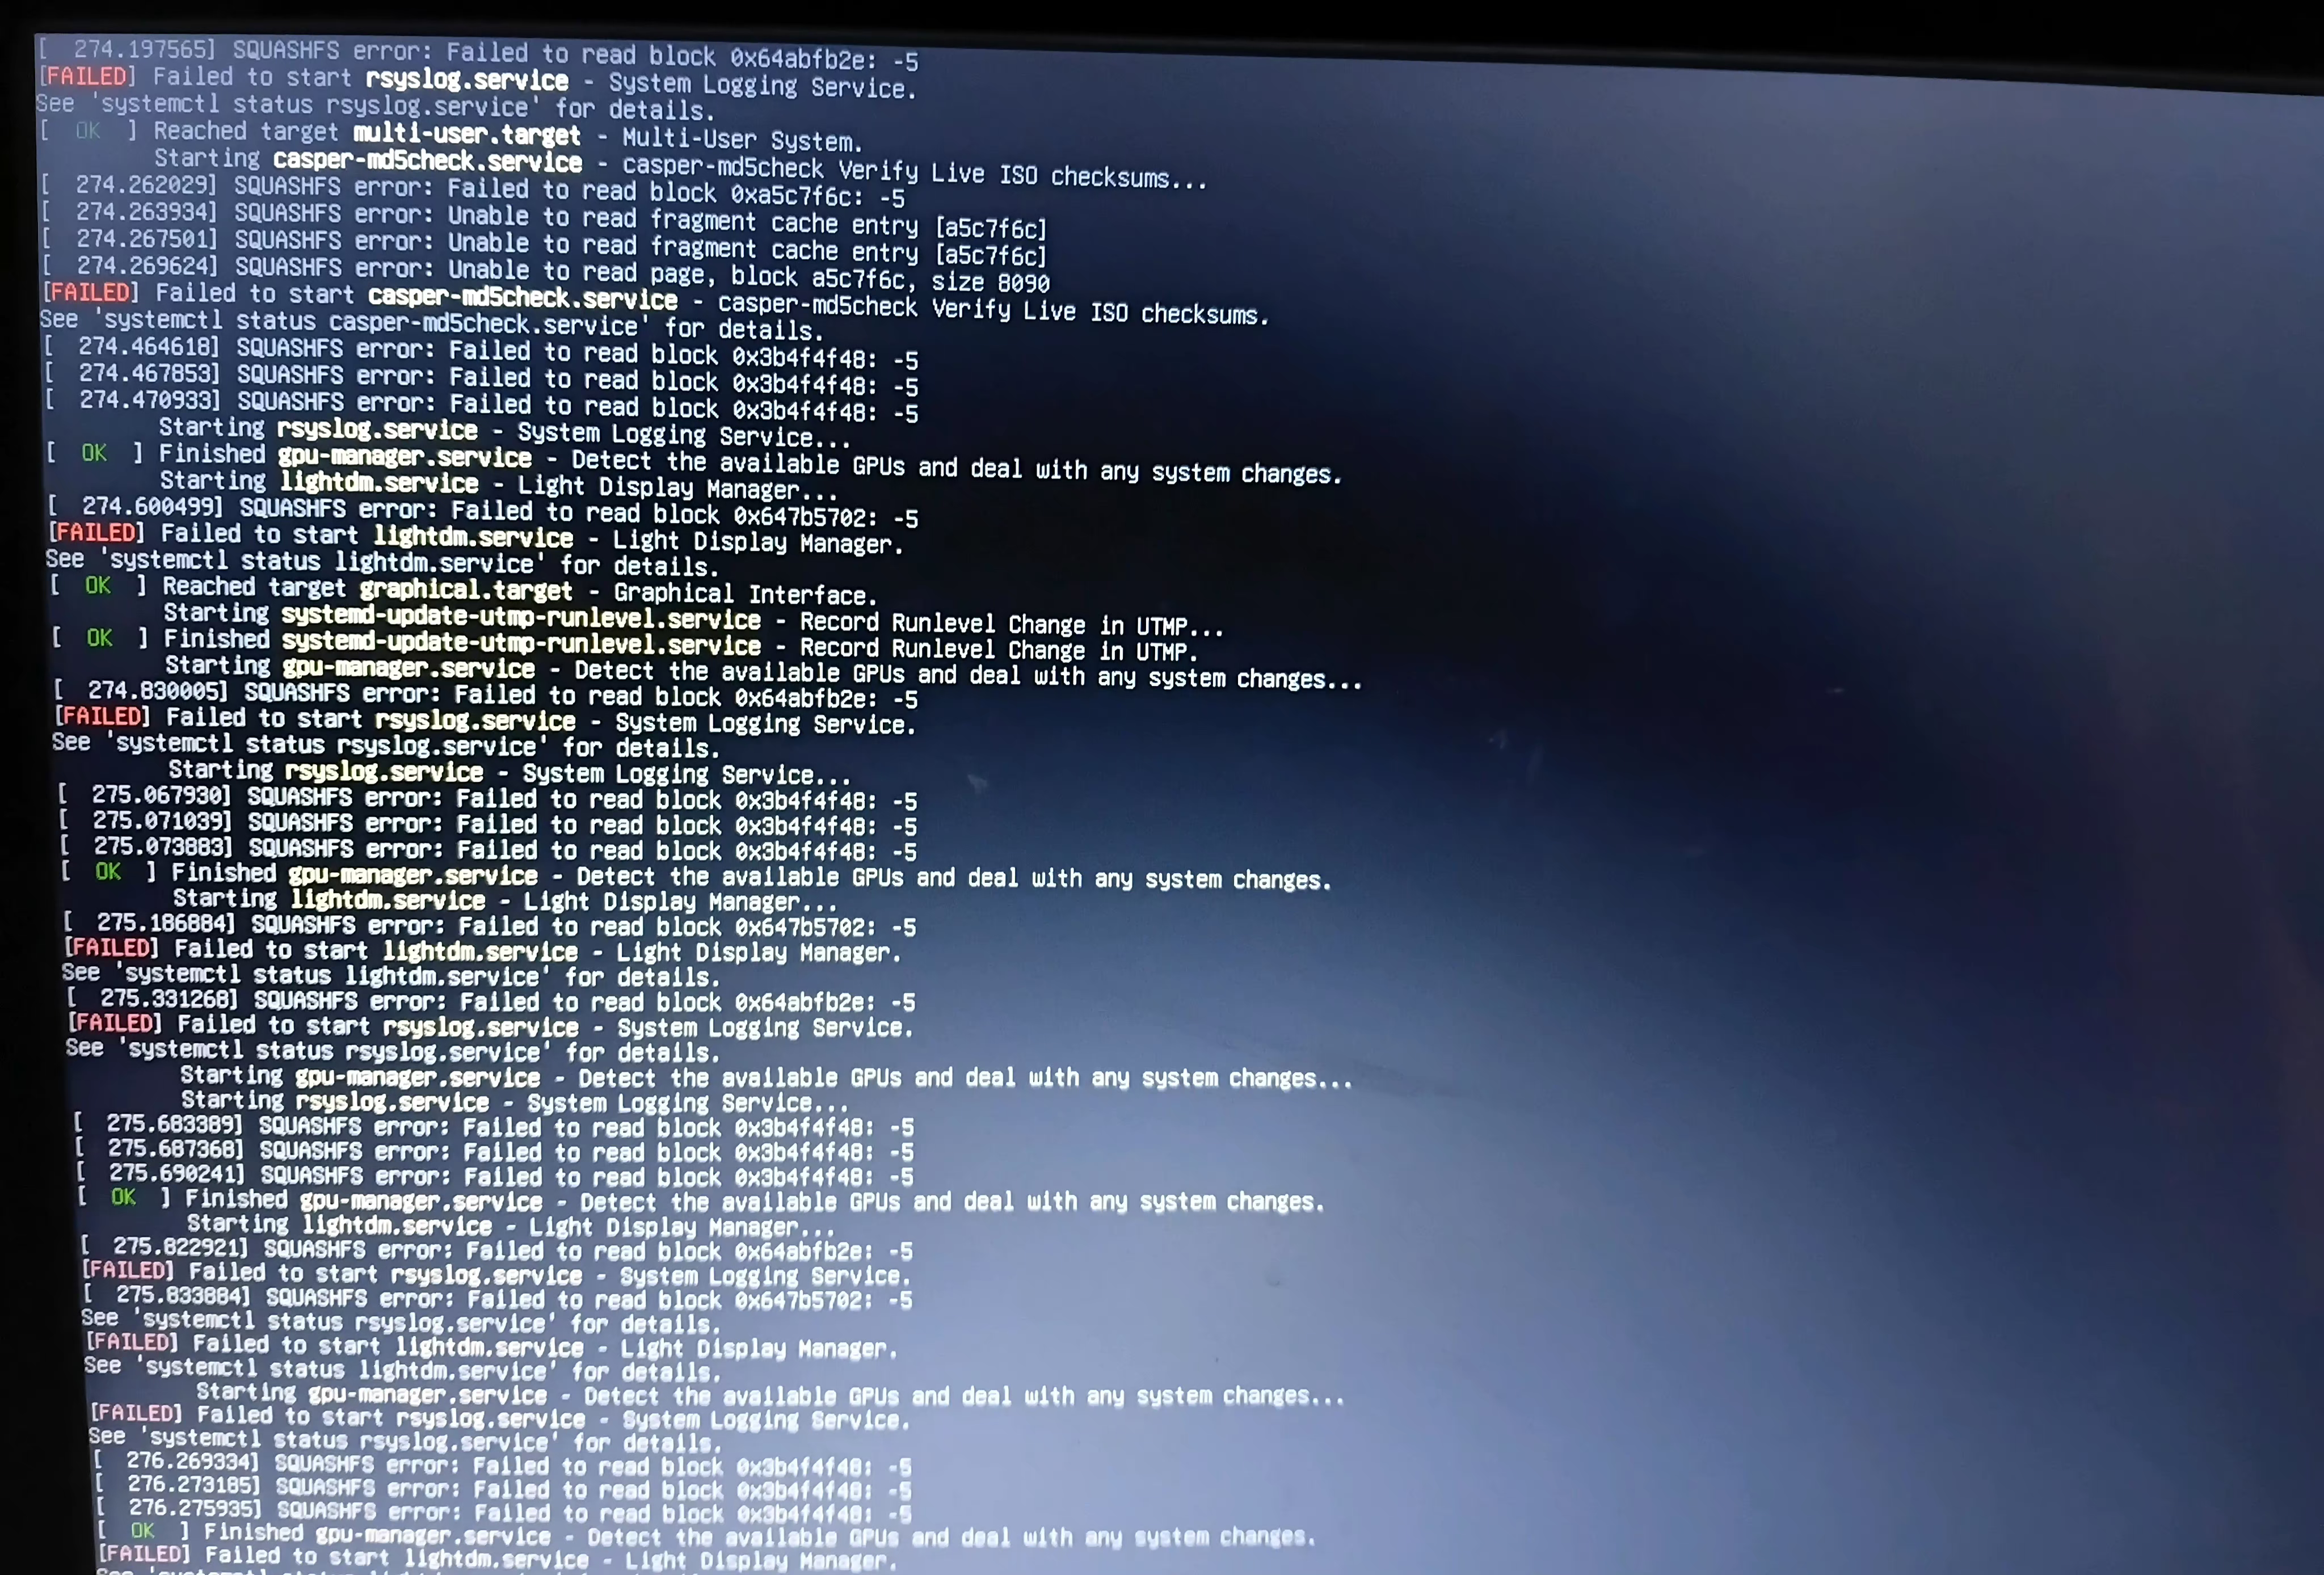
These were kernel messages — the Linux kernel reporting what it was doing as it tried to initialize the hardware.
In a strange way, this felt better than the frozen logo. At least the system was communicating, even if I couldn’t understand what it was saying.
One error kept repeating across almost every line:
[ 275.067930] SQUASHFS error: failed to read block 0x3b4f48: -5
I had already verified the ISO with SHA256, so I suspected this was a hardware read failure, not a corrupt file. But suspicion doesn’t stop anxiety when raw kernel output is raining down your display for the first time.
Dropping into TTY2
At some point during the text flood, I pressed Ctrl + Alt + F2.
I did not fully understand what that key combination would do. I had seen it mentioned as a troubleshooting step and decided to try it.
It dropped me out of the graphical display and into a secondary, text-only virtual terminal called TTY2.
I was staring at a login prompt:
Linux Mint 22.3 Zena mint tty2 mint login:
And even there, the error messages kept interrupting the screen:
[ 449.024896] I/O error, dev loop0, sector 331360 [ 449.025680] SQUASHFS error: Failed to read block 0x65201256: -5 [ 449.025850] SQUASHFS error: Unable to read fragment cache entry [ 449.026073] SQUASHFS error: Unable to read page, block 65201256
The same I/O read failures. The same SQUASHFS errors.
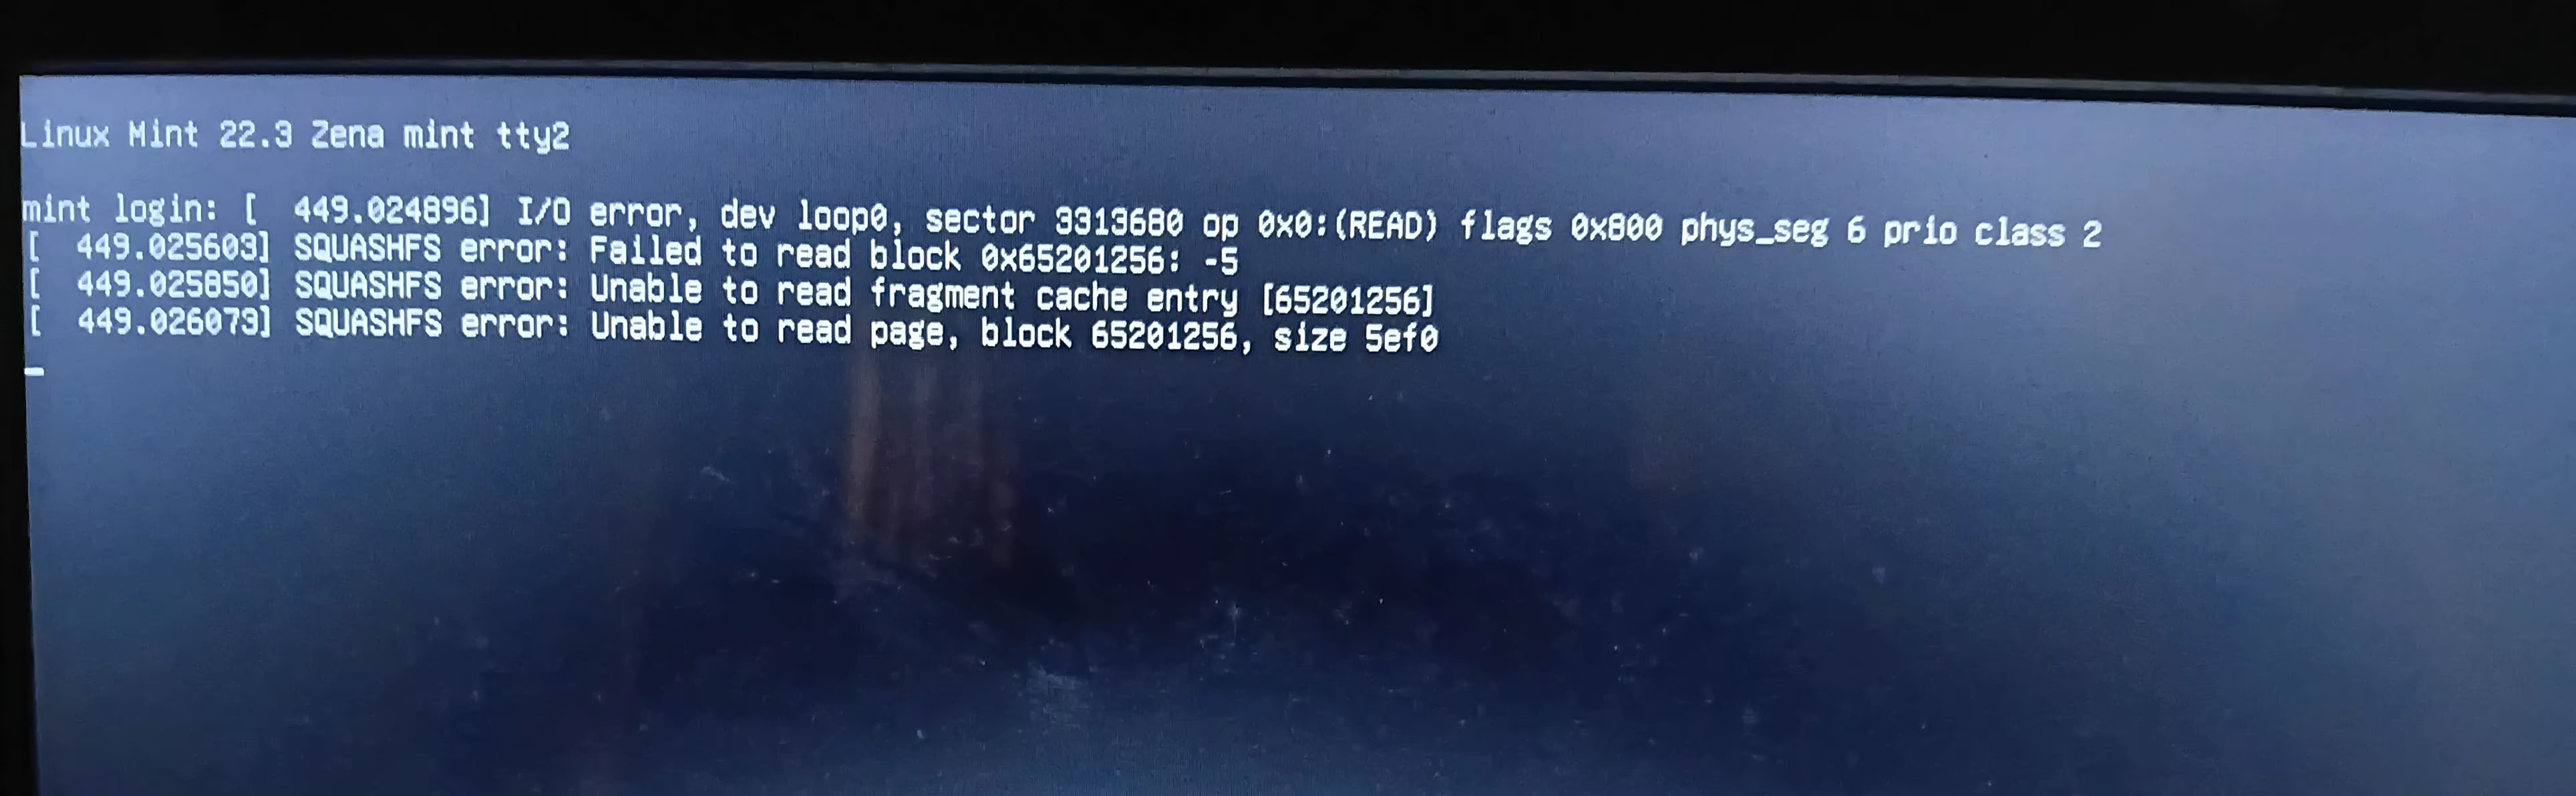
This felt like the end of the road. None of my tricks were working, nothing made sense, and nothing I had prepared had braced me for this wall of errors.
That was the dead end.
Stepping Back to Verify
At this point, I had two failed boot attempts and no working Linux environment. The instinct was to question everything.
Was the ISO file corrupted? Had something gone wrong during the 90-minute transfer to the SD card? Was the file sitting on the Ventoy device actually intact?
I went back into Windows and ran the same certutil SHA256 check
from part 1 against both the orginal ISO in my Downloads folder
and the copy on the Ventoy SD card.
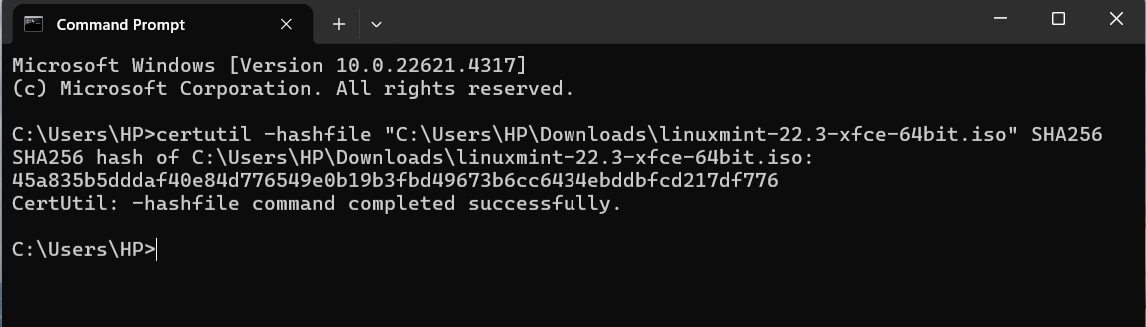
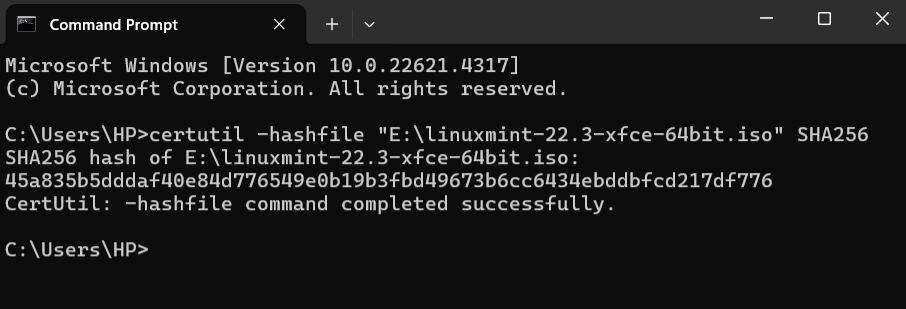
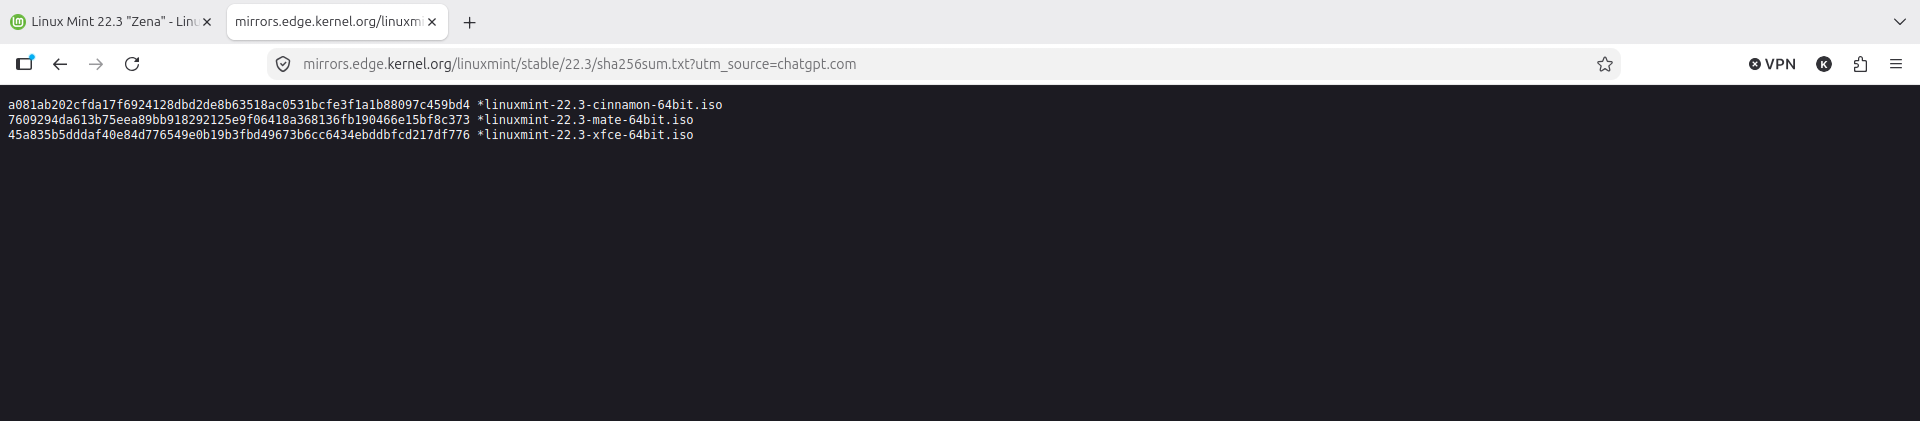
Both hashes matched the official Linux Mint checksum exactly. As I covered in Part 1, this ruled out file corruption entirely. The ISO was clean. The problem had to be elsewhere.
Isolating the Last Variable
At this stage, I had worked through most of the checklist:
- Verified, uncorrupted ISO
- Secure Boot turned off
- Ventoy-prepared SD card ready
I also finally disabled Fast Startup — a step I had missed back in Part 1. To be clear, Fast Startup was not the cause of the boot failures I experienced in this phase. Those were hardware connection issues. But leaving it enabled could have caused NTFS file system conflicts once Linux was actually installed, so it needed to be addressed before going any further.
The only variable left untested was the boot media device path.
Every failed attempt had run through the Tecno T455 phone acting as a bridge over a USB Type-C cable. That path was never engineered for continuous, high-throughput operating system boot operations.
So I obtained a dedicated SD card reader.
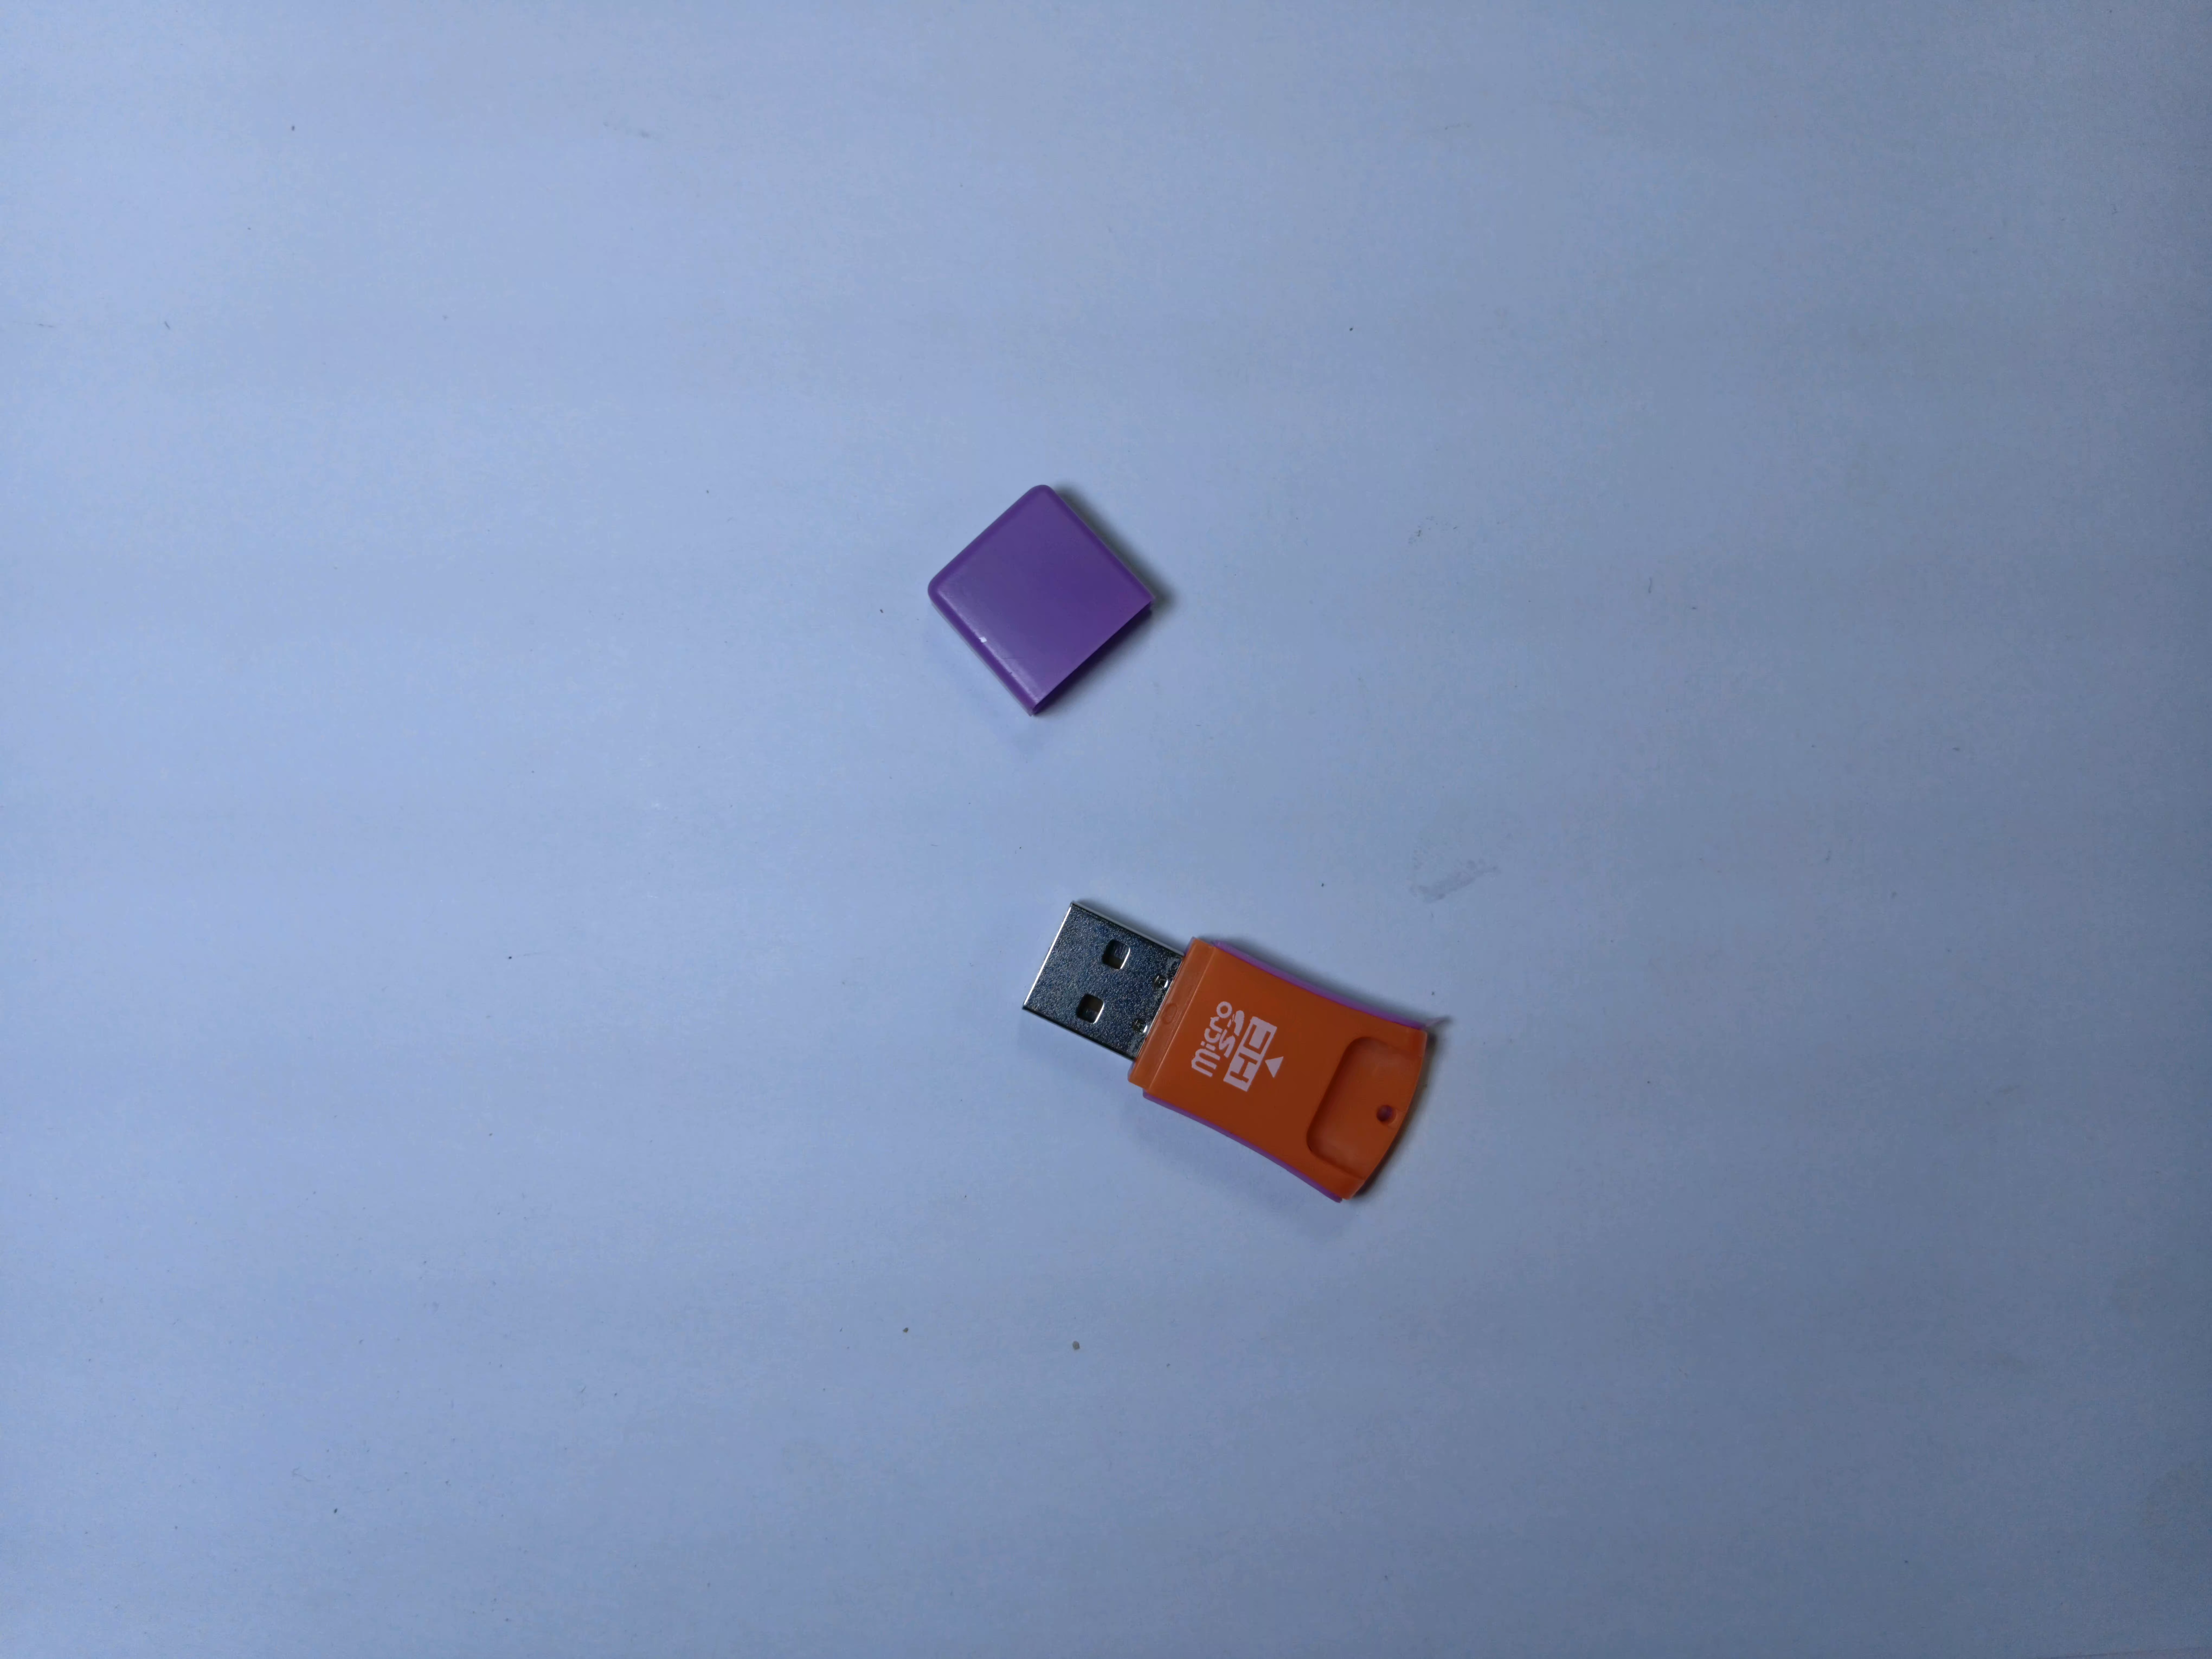
I removed the SD card from the phone, slotted it into the dedicated reader, and plugged it directly into the laptop’s USB port.
Same SD card. Same Ventoy setup. Same ISO file. Different connection path.
I restarted the laptop, opened the BIOS boot menu, and selected the card reader.
It Worked
Ventoy loaded. I selected the Linux Mint ISO. The GRUB menu appeared. I selected Start Linux Mint XFCE 22.3 64-bit.
This time, the Linux Mint logo appeared — and kept moving.
Seconds later, the desktop loaded. The live environment was running cleanly. WiFi connected. The system was completely responsive.
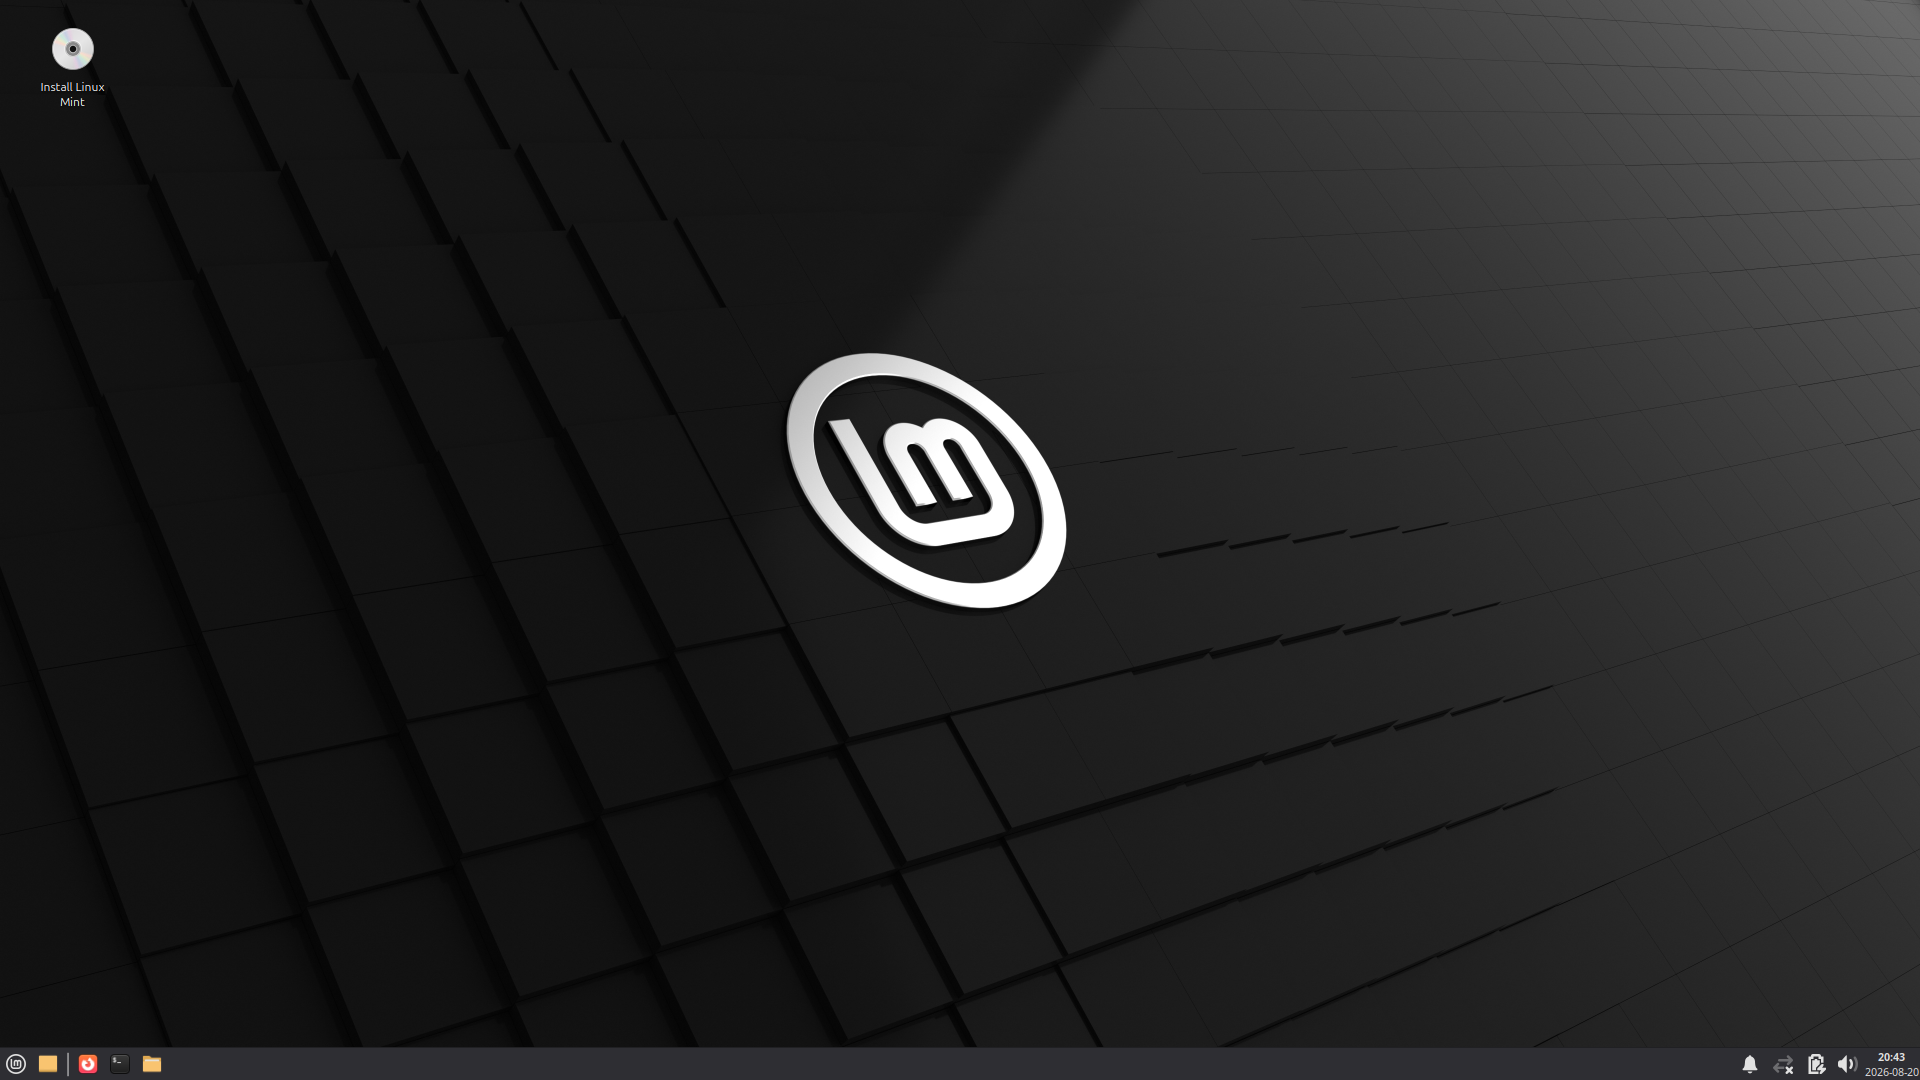
The relief was overwhelming. I had never been so genuinely excited to see a desktop background.
That successful boot changed the diagnosis instantly. With Secure Boot already handled and Fast Startup disabled, the fact that the exact same SD card booted cleanly through a dedicated reader proved where the bottleneck had been all along: the Tecno T455 as a boot device.
The phone was capable of transferring files, but it could not present the storage to the laptop’s firmware reliably enough to support a live boot sequence.
Hindsight Analysis: What the Machine Was Actually Saying
Now that the machine was working, I wanted to understand what all those intimidating errors had actually meant.
What Did the SQUASHFS Errors Mean?
SQUASHFS is a compressed, read-only filesystem format that Linux live distributions use to run an operating system directly from RAM and boot media without installing it to disk.
The error code -5 is a kernel-level Input/Output (I/O)
error. It meant the CPU was requesting compressed data
blocks from the live media, but the Tecno phone’s USB
connection could not sustain the continuous data throughput
the kernel required, likely due to protocol overhead and
transfer instability. The kernel wasn’t crashing because of
bad code; it was starving for data it couldn’t read.
The Speed Test That Proved It
This diagnosis was confirmed when I tested the transfer speeds afterward. The same 2.82GB ISO copied through the Tecno T455 moved at roughly 434 KB/s. Through a dedicated card reader, it hit 7.87 MB/s — an 18x increase from changing nothing except the connection path.
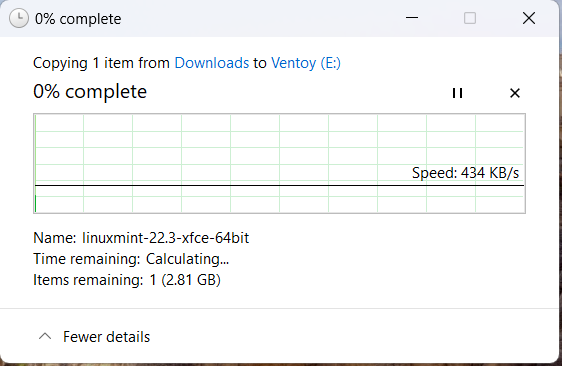
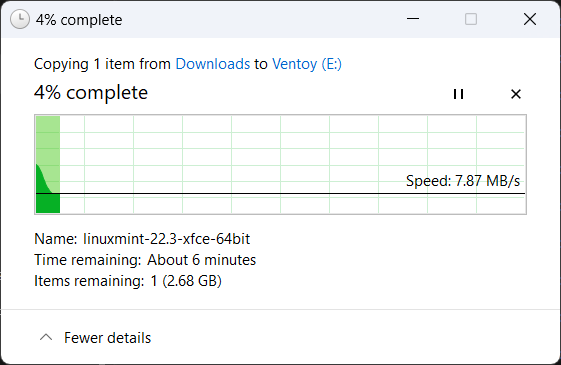
At 434 KB/s, the phone simply could not feed data to the kernel fast enough to sustain a live boot. At 7.87 MB/s, the card reader had no such problem. The SQUASHFS errors were not a software bug. They were a bandwidth starvation issue caused by an improvised hardware connection.
What Was TTY2?
Linux systems run multiple virtual consoles simultaneously. TTY1 is typically reserved for the graphical display manager (the desktop interface). TTY2 through TTY6 are text-only terminal sessions running in the background.
When a graphical environment fails to launch, pressing Ctrl + Alt + F2 drops you directly into TTY2. For an experienced administrator, this is an emergency rescue environment used to check logs, fix display drivers, or restart services. For me at that moment, it was an intimidating prompt — but it showed me for the first time that beneath the graphical interface, Linux provides direct, low-level access to the machine.
What This Troubleshooting Process Actually Proved
Looking back, the path from failure to success followed a clear diagnostic methodology:
- First failure: Device recognized but refused to boot. Resolution: Disabled Secure Boot in BIOS, which was blocking Ventoy’s unsigned bootloader.
- Second failure: Stalled at logo; repeated SQUASHFS I/O read errors under compatibility mode. Resolution: Diagnosed as hardware read instability.
- Integrity verification: Re-calculated SHA256 checksum on the Ventoy media to rule out file corruption. Result: Clean match.
- Environment cleanup: Disabled Windows Fast Startup to ensure a clean hardware handoff.
- Variable isolation: Kept the SD card, Ventoy setup, and ISO constant while swapping only the connection device (phone to card reader).
- Resolution: Clean live boot on the first attempt with an 18x throughput increase.
The Diagnostic Pattern That Actually Worked
Change one variable at a time until the root cause reveals itself. I didn’t know the formal term while I was sweating over BIOS screens at midnight. But applying that logic is what transformed two failures into a working operating system.
The troubleshooting was over. The live environment was working.
Now came the final step: writing Linux Mint permanently onto the SSD.
Previous: Part 1 — From Windows Frustration to a Verified
ISO
Continue to Part 3 — Installation, GRUB and the
Performance Verdict